Did you know that millions of PC builders and gamers upgrade their graphics card every single year, all chasing that next level of performance? If you’ve just unboxed a shiny, powerful new GPU, you’re probably feeling a mix of excitement and a little bit of anxiety. Staring into your PC case can feel like looking under the hood of a complex sports car; it’s impressive, but also intimidating. The big question on your mind is likely, “How do I get the old one out without breaking anything?”
If that sounds familiar, you’re in the right place. This guide is all about how to remove a graphics card safely, carefully, and without any of that heart-stopping, wallet-shrinking dread. I remember the first time I performed this exact operation. My hands were literally sweating, and I must have watched five different tutorial videos before I even dared to touch a screwdriver. It can feel like you’re about to perform delicate surgery on a very expensive, beloved friend. But trust me, once you do it, you’ll realize it’s a straightforward process. Let’s walk through it together, step by step.
More in Graphics Cards Category
What Graphics Card Does the PS5 Have
How to Install a Graphics Card
Before You Even Open Your PC Case: What Should You Prepare?
Success in any project, from baking a cake to PC building, often comes down to preparation. Before you even think about laying your computer on its side, taking a few minutes to get organized will make the entire process smoother and safer. I learned this the hard way years ago, ending up with a half-disassembled PC while I scrambled through kitchen drawers looking for the right screwdriver. Let’s avoid that.
Gathering Your Essential Tools
You don’t need a professional toolkit, but having a few specific items on hand is non-negotiable for a safe and stress-free removal. Think of this as your pre-flight checklist.
- A Phillips Head Screwdriver: This is your primary tool. Most, if not all, screws inside a PC case will be Phillips head. A screwdriver with a magnetic tip is an absolute lifesaver, preventing tiny screws from falling into the dark, mysterious corners of your motherboard.
- An Anti-Static Wrist Strap: This is highly recommended. Your body can build up static electricity, and a sudden discharge can permanently damage sensitive components like your GPU or motherboard. An anti-static strap safely grounds you to the PC’s metal frame.
- A Small Bowl or Magnetic Tray: You will be removing a few screws, and they have a magical ability to vanish into thin air (or the carpet) the moment you put them down. A small container keeps them accounted for.
- Good Lighting: Your room’s overhead light is rarely enough. A small flashlight, a headlamp, or even your phone’s light will help you see the small clips and latches you’ll be dealing with inside the case.
What About Software? Do I Need to Uninstall Drivers First?
This is a common point of debate in PC building forums. Should you uninstall your old graphics card’s drivers before you physically remove the card? Some people say it’s unnecessary, as you can just do it after installing the new card.
However, from my experience, it’s a best practice that can save you a lot of headaches. Uninstalling the old drivers first helps prevent potential software conflicts that can cause instability, crashes, or performance issues with your new card. For a truly clean slate, many enthusiasts recommend a tool called Display Driver Uninstaller (DDU). It’s a free utility that completely wipes every trace of old drivers from your system. Consequently, when you install your new card and its drivers, you’re starting with a perfectly clean canvas.
Let’s Get Started: The Step-by-Step Guide to Removing Your Graphics Card
Alright, tools are gathered, and your workspace is ready. Take a deep breath. The most important things to remember from here on out are to be gentle and take your time. Nothing inside a modern PC should require brute force. If something feels stuck, it’s almost certainly because a latch or screw is still holding it in place.
Step 1: Power Down and Disconnect Everything
This is the most critical safety step. Do not skip a single part of this.
First, shut down your computer through the operating system (clicking “Shut Down” in Windows, for example). Once the PC is completely off, reach around to the back and flip the physical power switch on the Power Supply Unit (PSU) to the ‘O’ (Off) position. Next, unplug the main power cord from the wall outlet and from the PSU itself. After that, go ahead and disconnect every other cable plugged into your PC: your monitor cables (DisplayPort or HDMI), USB devices, Ethernet cable, and audio jacks.
Here’s a little trick I learned over the years: after everything is unplugged, press and hold the power button on the front of the case for about five seconds. This will discharge any residual electricity stored in the system’s capacitors, making it even safer to work on.
Step 2: How Do I Safely Open My Computer Case?
With your PC fully disconnected, move it to a clear, stable workspace like a table or a hard floor. Avoid working on carpet if at all possible, as it’s a major source of static electricity.
You’ll typically need to remove the left-side panel (when looking at the front of the PC) to access the motherboard. Many modern cases use thumbscrews that you can undo by hand, while others might require your Phillips screwdriver. Once the screws are out, the panel might slide back before it comes off, or it might swing open like a door. Gently lay the case down on its side with the open side facing up. This gives you a stable, top-down view of all the components, which is much easier than trying to work on it while it’s standing upright.
Step 3: Ground Yourself to Prevent Static Discharge
Now we put that anti-static wrist strap to use. Put the strap around your wrist and attach the alligator clip on the other end to an unpainted, bare metal part of your computer’s chassis. This creates a connection that ensures any static charge your body builds up is safely discharged into the case frame instead of a sensitive microchip.
If you don’t have a wrist strap, you can still work safely by frequently touching a metal part of the case with your bare hand. This does the same job, but you have to remember to do it every minute or so, especially if you move around.
Step 4: Where Are the Power Cables and How Do I Unplug Them?
Look at your graphics card. You will likely see one or two thick cables running from your power supply to the side or top edge of the card. These are the PCIe power connectors, and they give the card the extra juice it needs to run.
These connectors don’t just pull straight out. They have a small plastic retention clip on them. You need to press down or squeeze this clip to release the lock, and then the connector will slide out smoothly. Be firm but gentle. Wiggling it slightly from side to side while pressing the clip can help loosen it. Once they’re unplugged, gently move them out of the way.
Step 5: Unscrewing the Graphics Card from the Case Bracket
Your graphics card is secured to the back of the PC case by a metal bracket—this is the part where your monitor plugs in. You’ll see one or two screws holding this bracket firmly to the chassis. Use your Phillips screwdriver to remove these screws. As soon as they’re out, place them directly into your magnetic tray or bowl so they don’t get lost. With these screws removed, the card will only be held in by the motherboard slot itself.
Step 6: The Trickiest Part – How Do You Release the PCIe Slot Latch?
This step is the final boss of graphics card removal and the one that trips most people up. The graphics card is plugged into a long slot on the motherboard called a PCI Express (or PCIe) slot. At the far end of this slot (away from the backplate you just unscrewed), there is a small plastic latch or clip.
This latch is the final locking mechanism holding the card in place. You must release it before you can lift the card out.
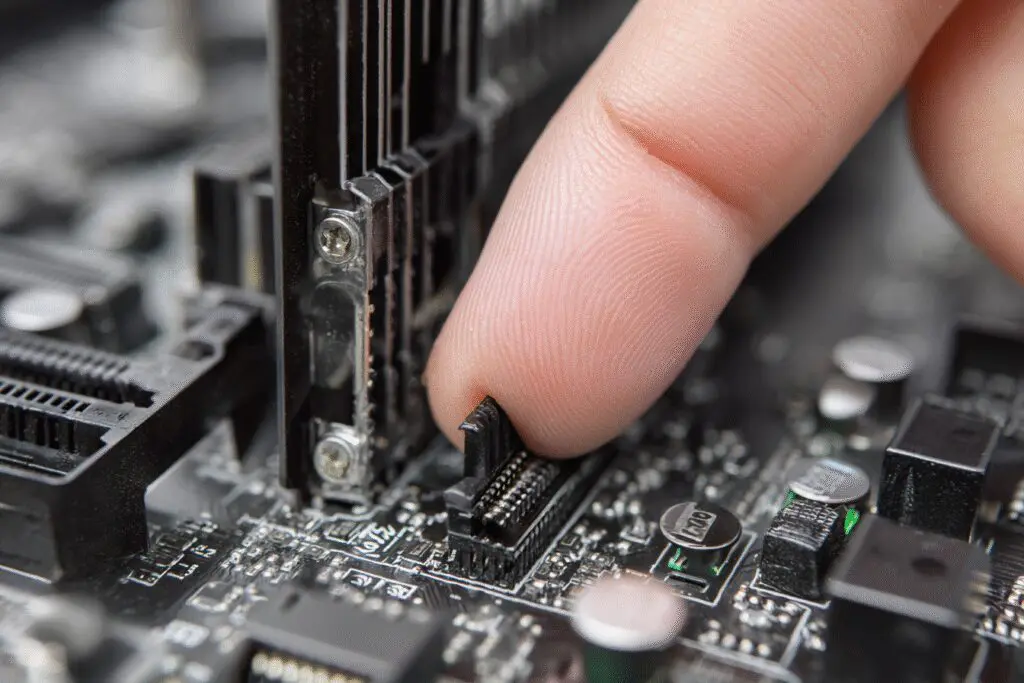
The design of this latch varies slightly between motherboards. Some are large tabs you press down, while others are smaller clips you need to push to the side. It can often be difficult to see, tucked away under the bulk of the graphics card. This is where your flashlight comes in handy. Peer into the space at the end of the slot to identify the latch. Once you’ve found it, gently press it with your finger until you feel or hear a faint click. If your fingers are too big to reach, I’ve found that the eraser end of a pencil works perfectly for gently pushing the latch.
Understanding how these slots are designed can make the process less intimidating. For those who want a deeper dive, the University of Washington’s Electrical & Computer Engineering department offers a fantastic visual guide on motherboard components, which can help you visualize the PCIe slot you’re working with.
Step 7: Lifting the Graphics Card Out of the Motherboard Slot
With the power cables disconnected, the bracket screws removed, and the PCIe latch released, the card is now free.
Grasp the card firmly with two hands, holding it by the top edge and the heatsink shroud. Avoid touching the gold contacts on the bottom or the circuit board as much as possible. Lift it straight up and out of the slot, evenly and without twisting. It should come out with minimal resistance. If you feel it snag, stop immediately. Do not pull harder. The most likely culprit is that the PCIe retention latch didn’t fully disengage. Double-check it and try again.
What Should I Do After the Graphics Card is Removed?
Congratulations, you’ve successfully removed the graphics card! You’re now holding a very sophisticated and expensive piece of technology in your hands. What comes next depends on your plans.
How to Properly Store Your Old Graphics Card
Whether you plan to sell your old card, keep it as a backup, or just put it away, proper storage is important. The absolute best way to store a graphics card is inside an anti-static bag. This is the metallic, often silver or pink, bag that new computer components come in. It protects the card from the same static electricity you were careful to avoid during removal.
If you still have the original box, place the bagged card inside it for excellent physical protection. If you don’t have an anti-static bag, wrapping the card in plain paper is a last resort, but you should try to acquire a proper bag if you plan on storing it long-term.
Preparing the PC for a New Card or Onboard Graphics
If you’re installing a new graphics card, the process is essentially the reverse of what you just did. The empty PCIe slot is now ready and waiting for its new resident.
However, if you’re not immediately installing a new card (perhaps you’re cleaning the PC or waiting for a new one to arrive), you might still be able to use your computer. Many CPUs have integrated graphics built-in. This allows you to get a video signal directly from your motherboard. Look for HDMI or DisplayPort connections near the USB and Ethernet ports on the back of your PC. You can plug your monitor in there to use your computer while you wait.
Are There Common Mistakes I Should Avoid When Removing a GPU?
Over the years, I’ve made a few of these mistakes myself, and I’ve helped friends who have made others. Learning from our collective pain can help ensure your experience is flawless. Here are the big things to watch out for.
- Don’t forget to unplug the PC. It sounds incredibly basic, but in the excitement of an upgrade, people sometimes forget. Working on a powered system is a recipe for disaster for both you and your components.
- Don’t work on a carpet. I know I’ve mentioned it before, but it’s that important. Carpet is a factory for static electricity. Work on a hard surface.
- Don’t yank on cables or the card itself. Everything in a PC is designed to connect and disconnect smoothly. If it feels stuck, there is a reason. Find the clip, latch, or screw you missed. Patience is your best tool.
- Don’t forget the PCIe retention clip. This is, without a doubt, the number one cause of stuck graphics cards and damaged motherboards during removal. This tiny piece of plastic is the final gatekeeper. Always make sure it’s released.
- Don’t lose your screws. That little tray or bowl is your best friend. Hunting for a tiny black screw on a dark floor is no one’s idea of a good time.
You’ve Done It!
See? Not so scary after all. You’ve just successfully completed a key part of any PC upgrade. Whether you’re about to slot in a brand new, top-of-the-line card to crush the latest games or you were just doing some deep cleaning. The skills you just used are fundamental to PC ownership, opening the door to future upgrades and maintenance. Now, go enjoy those new frame rates or your cleaner, happier computer!
Frequently Asked Questions – How to Remove a Graphics Card

What steps should I follow after removing the graphics card from my PC?
After removal, you can clean the inside of your case with compressed air if needed, and if installing a new card, follow the reverse steps: open the PCIe slot, insert the new card, lock the PCIe latch, screw it into the case, and then connect the power cables and reinstall the side panel.
What is the safest way to release the PCIe slot retention clip?
Carefully locate the small plastic latch at the end of the PCIe slot, then press or push it to unlock the card from the motherboard, ensuring you do not use excessive force to avoid damaging the motherboard or the card.
How should I prepare my workspace for removing a graphics card?
Prepare a clean, flat surface like a table or desk, avoid working on carpet to reduce static, ensure good lighting, and have a flashlight if needed. Also, make sure to have your tools and anti-static measures ready.
What basic tools do I need to remove a graphics card safely?
The basic tools needed are a Phillips-head screwdriver, ideally a #2 size, and an anti-static wrist strap to ground yourself and prevent static electricity from damaging computer components.
Why is it important to uninstall graphics drivers before removing the graphics card?
Uninstalling graphics drivers before removing the card is crucial because it prevents software conflicts and issues such as crashes or display errors that may occur if outdated drivers are left on the system.


