Did you ever spend a small fortune on a new graphics card, meticulously build your dream gaming rig, and then boot up your favorite new title only to be greeted by frustrating stutters and lag? It’s a feeling every PC gamer knows well. You have the powerful hardware, but you’re not getting the buttery-smooth performance you paid for. What gives?
The truth is, a powerful PC is only half the battle. The other half is optimization. Knowing how to optimize PC for gaming is a skill that separates the frustrated from the victorious. It’s a process of tweaking, tuning, and telling your computer exactly how to use its power. Fortunately, it’s not black magic. After years of building rigs and chasing those elusive extra frames, I can tell you it comes down to a series of logical steps. This guide will walk you through all of them, from foundational system prep to the nitty-gritty of in-game settings.
More in Gaming Performance & Optimization Category
Does Cleaning PC Improve Performance
Before You Even Launch a Game: What Are the First Steps?
Before you even think about tweaking shadow quality or ambient occlusion, you need to make sure your PC’s foundation is solid. Think of this as stretching before a workout; it prevents problems and sets you up for success. Ignoring these initial steps means you’re leaving free performance on the table.
Is Your Graphics Card Driver Actually Up to Date?
Let’s start with the single most important piece of software for your gaming performance: your graphics driver. A lot of people install it once and forget about it. That’s a huge mistake.
Graphics drivers are not just simple software; they are complex packages containing specific optimizations for new games. When a major new title is released, you can bet that NVIDIA, AMD, and Intel are releasing a “Game Ready” driver alongside it. These updates can provide massive performance boosts, fix graphical glitches, and improve stability. Consequently, running on a six-month-old driver is like trying to run a marathon in flip-flops.
- For NVIDIA GPUs: The easiest way is through the GeForce Experience application. It will automatically notify you of new drivers and allow for one-click installation.
- For AMD GPUs: The AMD Software: Adrenalin Edition application serves the same purpose. It manages your drivers and provides a suite of other useful tools.
- For Intel GPUs: The Intel Driver & Support Assistant is your go-to tool for keeping your graphics drivers fresh.
Checking for a driver update should be your first move whenever you install a new game or experience poor performance.
How Can You Tame Those Pesky Background Apps?
Your PC is constantly doing a dozen things at once, even when it seems idle. Cloud services are syncing, software updaters are checking for new versions, and various launchers are running in the background. While each of these processes might only use a little bit of CPU power or RAM, they add up. When you’re gaming, you want 100% of your PC’s resources dedicated to the game.
The Task Manager is your best friend here. Press Ctrl+Shift+Esc to open it up and click on the “Startup” tab. You will likely be shocked at how many programs launch themselves every time you boot your computer. Go through the list and disable anything you don’t need running 24/7. Your web browser, your games, and your chat programs don’t need to start with Windows. Be sensible, of course—leave things like your antivirus and essential audio drivers enabled. Taming your startup programs will not only improve gaming performance but will also make your PC boot faster.
Have You Switched on Windows Game Mode?
Believe it or not, Microsoft Windows has a built-in feature specifically designed to help your games run better. It’s called “Game Mode,” and while it’s not a miracle cure, it’s a simple switch that can genuinely help.
When enabled, Game Mode does two main things:
- It prioritizes your game, giving it more access to your CPU and GPU resources.
- It prevents some background tasks, like Windows Update, from running and interrupting your gameplay with notifications or performance hits.
To turn it on, just go to Settings > Gaming > Game Mode and flip the switch. It’s a set-it-and-forget-it feature that provides a small but noticeable benefit for most systems.
Diving Deeper: How Do You Optimize Your System Settings for Peak Performance?
With the basic housekeeping done, it’s time to dig a little deeper into your Windows settings. These adjustments are designed to switch your PC from a general-purpose machine into a dedicated gaming rig, ready to prioritize speed above all else.
What is High Performance Power Plan and Why Should You Use It?
By default, Windows uses a “Balanced” power plan. This plan is designed to save energy by throttling your CPU’s speed when it’s not under heavy load. While this is great for browsing the web, it’s not ideal for gaming. The constant shifting of CPU speed can introduce micro-stutters.
Switching to the “High Performance” power plan solves this. It tells your CPU to stay at its maximum clock speed at all times, ensuring there’s no delay when the game suddenly demands more power.
To change it:
- Open the Control Panel.
- Go to “Hardware and Sound,” then “Power Options.”
- You should see “High Performance.” Select it, and you’re good to go. On some newer versions of Windows 11, you might find this setting under Settings > System > Power & battery, set to “Best performance.”
Can Adjusting Visual Effects in Windows Really Boost FPS?
The slick animations, transparent windows, and drop shadows in the Windows interface look nice, but they also consume a tiny amount of your GPU’s resources. When you’re trying to squeeze out every possible frame, every little bit counts. You can tell Windows to stop worrying about looking pretty and focus entirely on performance.
Press the Windows key and type “performance,” then select “Adjust the appearance and performance of Windows.” In the dialog box that appears, you’ll see a long list of visual effects. Simply select the bubble for “Adjust for best performance.” This will turn everything off. However, it can make Windows look a bit dated. I personally recommend selecting this option and then manually re-enabling “Show thumbnails instead of icons” and “Smooth edges of screen fonts.” This gives you most of the performance benefit without sacrificing basic usability.
Why Should You Keep Your PC Physically Clean?
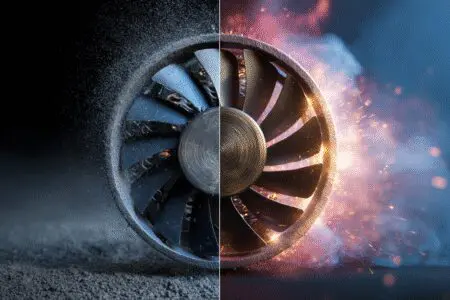
This isn’t a software tweak, but it’s critically important. Your PC components generate a lot of heat, and they rely on fans and heatsinks to dissipate it. Over time, dust clogs these cooling systems.
When a component like your CPU or GPU gets too hot, it automatically slows itself down to prevent damage. This is called thermal throttling, and it’s a silent killer of gaming performance. I once gained a solid 10 FPS in a demanding game just by taking my PC outside and cleaning the CPU cooler with a can of compressed air. No joke. At least twice a year, open up your PC case and gently blow the dust out of all the fans, heatsinks, and vents. A clean PC is a cool PC, and a cool PC is a fast PC.
The Heart of the Matter: How to Optimize In-Game Settings for the Best Experience?
Alright, your PC is prepped and ready. Now we get to the fun part: tuning the actual in-game graphics settings. This is where you’ll see the biggest changes. The goal here is to find the perfect balance between visual quality and high frame rates for your specific hardware.
Resolution vs. Frame Rate: What’s the Golden Rule?
The first setting you’ll always see is resolution. This determines how many pixels are on your screen. Running at a higher resolution, like 1440p or 4K, makes the image incredibly sharp, but it puts a massive strain on your GPU.
Here’s the golden rule: Always try to run at your monitor’s native resolution. If you have a 1080p monitor, run the game at 1920×1080. If you have a 1440p monitor, run it at 2560×1440. Running at a lower-than-native resolution will make the entire image look blurry and soft. Lowering the resolution should be your absolute last resort for gaining performance. It’s much better to lower other settings first.
Which Graphics Settings Have the Biggest Impact on FPS?
Not all graphics settings are created equal. Some have a gigantic impact on performance, while others offer only minor visual improvements for a high FPS cost. When you’re hunting for frames, these are the first settings you should look at turning down from “Ultra” to “High” or “Medium.”
- Shadow Quality: This is almost always the number one performance killer. High-resolution, soft-edged shadows look fantastic, but they require a ton of computational power. Dropping shadows from Ultra to High often yields a 10-15% FPS boost with a barely noticeable visual difference during fast-paced gameplay.
- Anti-Aliasing (AA): This technology smooths out the jagged, pixelated edges on objects. It’s important for a clean image, but some types are very demanding. MSAA (Multi-Sample Anti-Aliasing) is often the most expensive. FXAA is cheaper but can blur the image slightly. TAA (Temporal Anti-Aliasing) is a popular modern choice that offers a great balance of quality and performance. If you’re struggling for FPS, try a lower-cost AA option.
- Ambient Occlusion (AO): This setting adds small, soft shadows where objects meet, which adds a great sense of depth and realism to a scene. However, it can be costly. If your FPS is low, turning AO down or off can give you a nice little boost.
- Volumetric Effects (Fog, Clouds): God rays, realistic fog, and dense clouds look incredible, but they are incredibly taxing on your GPU. In games with a lot of atmospheric effects, turning this setting down is a fantastic way to reclaim frames.
- Texture Quality: This one is a bit different. It primarily depends on how much video memory (VRAM) your graphics card has. If your card has plenty of VRAM (e.g., 8GB or more for 1080p gaming), you can often set textures to High or Ultra with very little performance impact. But if you set it too high for your VRAM, you’ll experience massive stuttering.
- View Distance: In large, open-world games, this setting determines how far into the distance the game will render high-quality objects. A lower view distance can significantly improve performance, especially if your CPU is the bottleneck.
What About V-Sync, G-Sync, and FreeSync? Should You Use Them?
These technologies are all designed to solve a problem called “screen tearing,” where you see a horizontal line across the screen during fast motion. This happens when your GPU is outputting frames at a different rate than your monitor can display them.
- V-Sync (Vertical Sync): This is the oldest solution. It forces your GPU to cap its frame rate to your monitor’s refresh rate (e.g., 60 FPS on a 60Hz monitor). This eliminates tearing, but it can introduce significant input lag, which is terrible for competitive gaming. For this reason, it’s generally recommended to keep V-Sync off.
- G-Sync (NVIDIA) & FreeSync (AMD): This is the modern solution, often called “Adaptive Sync.” It allows your monitor to dynamically change its refresh rate to perfectly match the frame rate of your GPU. The result is perfectly smooth, tear-free gameplay with none of the input lag caused by V-Sync. If your graphics card and monitor both support one of these technologies, you should absolutely enable it. It’s a game-changer.
Advanced Tweaks for Those Who Want to Squeeze Out Every Last Frame
If you’ve done everything above and you’re still hungry for more performance, there are a few more advanced techniques you can explore. These require a bit more technical comfort but can unlock your hardware’s final reserves of power.
How Can Overclocking Your GPU Give You a Free Performance Boost?
Overclocking is the process of manually increasing the clock speeds of your graphics card beyond its factory settings. Think of it as carefully tuning an engine to get more horsepower. Using free and safe tools like MSI Afterburner, you can nudge up your GPU’s core clock and memory clock speeds in small increments.
This can result in a “free” 5-10% performance boost. However, it’s crucial to do this slowly and test for stability after each change. Pushing it too far can cause games to crash. This is a topic that requires its own detailed guide, but for enthusiasts, it’s a well-trodden path to extra performance.
Does Upgrading Your RAM Actually Improve Gaming?
While having enough RAM is important (16GB is the sweet spot for most gaming today), the speed of that RAM is also a major factor. RAM kits are often sold with an advertised speed, but they won’t run at that speed out of the box. You have to enable it.
This is done in your PC’s BIOS by enabling a setting called XMP (for Intel) or DOCP/EXPO (for AMD). Enabling this one profile can have a surprisingly large impact on performance, especially in CPU-bound games. Not enabling XMP is like buying a sports car and leaving it permanently stuck in economy mode.
What is the NVIDIA Control Panel and How Can You Use It?
Beyond the in-game settings, your graphics card has its own control panel with global settings that can affect all your games. For NVIDIA users, right-clicking on your desktop and opening the NVIDIA Control Panel reveals some powerful options.
Under “Manage 3D settings,” two settings are particularly useful:
- Power management mode: Change this from “Normal” to “Prefer maximum performance.” This ensures your GPU never downclocks itself during gameplay.
- Low Latency Mode: Setting this to “On” or “Ultra” can reduce input lag, making games feel more responsive. This is especially valuable for fast-paced shooters. AMD users have similar options within their AMD Software suite.
Putting It All Together: A Practical Optimization Workflow
That was a lot of information. So, how do you apply it in a practical, step-by-step way? Here is a simple workflow you can follow every time you want to optimize a new game.
- System Prep: Before you launch the game, check for new graphics drivers and make sure unnecessary background apps are closed.
- Initial Launch: Start the game and immediately go to the graphics settings. Set the game to your monitor’s native resolution and choose a global graphics preset like “High.”
- Benchmark: Run the game’s built-in benchmark tool. If it doesn’t have one, simply play a demanding section of the game for a minute and watch the frame rate using an FPS counter. Note your average FPS.
- First Adjustments: If your FPS is lower than you want, start by lowering the most demanding settings. Drop Shadow Quality one level. Then, turn down Ambient Occlusion or Volumetric Effects.
- Re-Benchmark: Run the same benchmark or play the same game section again. Did your FPS improve significantly?
- Repeat and Refine: Continue this process of making one or two changes at a time and then re-testing. This methodical approach helps you understand exactly which settings are impacting your performance the most. It allows you to find your personal sweet spot between eye candy and smooth gameplay. For more context on how graphics settings, particularly shaders, impact performance, a look at academic research like Purdue University’s Shader Simplification project can provide some deep technical insight.
Ultimately, PC game optimization is a balancing act. It might seem daunting at first, but taking thirty minutes to go through these steps can absolutely transform your gaming experience. You’ll be able to make informed decisions, understand why certain settings matter, and finally unlock the true power of your hardware. Now, go get those extra frames.
Frequently Asked Questions – How to Optimize PC for Gaming

Should I disable visual effects in Windows to enhance gaming?
Turning off certain visual effects can reduce system load, making your PC slightly faster and potentially boosting game performance, especially on older machines.
How can managing startup programs improve gaming performance?
Disabling unnecessary startup programs frees up system resources and memory, leading to faster boot times and more power available for gaming.
What are the first steps I should take to optimize my PC for gaming?
Begin by updating your graphics drivers and enabling Windows Game Mode to ensure your system prioritizes gaming performance.
What is FPS and why does it matter for gaming?
FPS stands for Frames Per Second, indicating how many pictures your PC displays every second. A higher FPS results in smoother gameplay, with 60 FPS being a common target for many games.
Why is optimizing my PC important for gaming performance?
Optimizing your PC ensures that all its parts work together efficiently, resulting in higher frame rates and reduced input lag, making gaming smoother and more responsive.


