I still remember my first PC build. It felt like playing the board game “Operation” with a thousand-dollar set of LEGOs. You’ve got all these expensive, delicate parts, and the instruction manuals seem to be translated from a language that doesn’t actually exist. If you’re sweating bullets about one particular step, I’m willing to bet it’s learning how to install a CPU cooler.
That’s the part where thermal paste, precise pressure, and the literal “brain” of your computer all come together. One wrong move feels like it could end in a puff of smoke. But relax. You can do this. Installing a cooler is much more about patience and preparation than it is about being a technical wizard. I’m going to walk you through it, step-by-step, to get your processor running cool and quiet.
More in Hardware Category
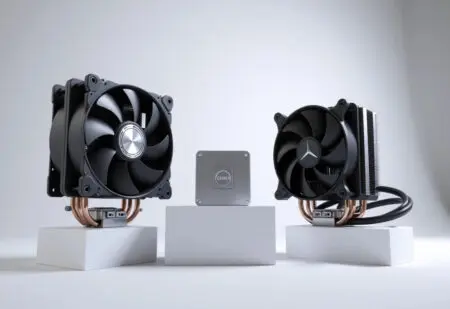
Air cooling vs. liquid cooling
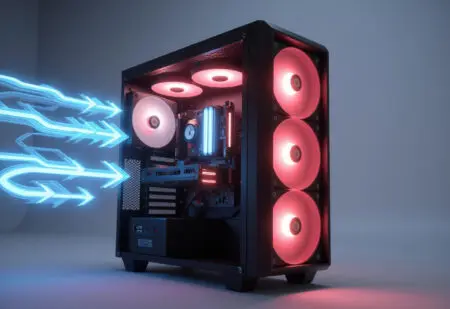
What Is the Best PC Case for Airflow
Key Takeaways
- Prep Work is Everything: Before a single screw turns, read your cooler’s manual and get your tools ready. Having everything you need within arm’s reach is the secret to a stress-free installation.
- Thermal Paste is Tricky: Whether you use the paste that’s pre-applied or put on your own, the right amount is vital. Too much is just as bad as too little.
- Apply Pressure Evenly: When you tighten the cooler, use a crisscross pattern. This guarantees the heatsink makes solid, flat contact with the CPU for the best possible heat transfer.
- Power Up the Fan: A cooler is just a metal brick without a spinning fan. You must plug its cable into the “CPU_FAN” header on your motherboard.
- Slow is Smooth, Smooth is Fast: Don’t rush this job. Take your time, double-check every step against the manual, and you’ll sidestep all the common rookie mistakes.
So, Why Does My CPU Even Need a Cooler?
It’s a fair question. Why are we about to bolt this big chunk of metal and fins onto that tiny, flat computer chip? Think of your CPU like a race car engine. When it’s running hard, it’s making billions of calculations every second. That intense electrical activity creates a shocking amount of heat in a tiny space.
If that heat has nowhere to go, the CPU’s temperature would fly into the danger zone in moments. To save itself, the chip throttles itself, deliberately slowing down to cool off. You’d see this as your game stuttering or your application lagging horribly. If things get even hotter, the computer will just shut itself off to prevent a meltdown. A CPU cooler is the radiator for that engine. Its entire purpose is to pull that destructive heat away from the chip and spread it out into the air, keeping the processor in its happy place so it can run at its full potential. It’s not optional; it’s essential.
Before We Dive In, What Tools Will I Actually Need?
Nothing kills the excitement of a PC project faster than getting halfway through and realizing you’re missing a tool. Let’s get everything lined up first. You don’t need a pro-level toolkit, just a few basics.
Here’s your pre-flight checklist:
- A Phillips Head Screwdriver: This is your main weapon. A standard #2 size will handle almost everything. If you can get one with a magnetic tip, future-you will be very grateful when a screw takes a dive into the PC case.
- Isopropyl Alcohol (90% or higher): Essential for cleaning. If you’re swapping coolers or just need a do-over on your thermal paste, this will clean the surfaces perfectly without leaving any gunk behind.
- Lint-Free Cloths: You need something to wipe with. Simple coffee filters are an amazing, cheap option. Try to avoid paper towels, as they can shred and leave tiny fibers behind.
- Your CPU Cooler and its Manual: I’m serious about this—the manual is your new best friend. Don’t skim it. Read it cover to cover. Every cooler mounts a little differently, and that booklet has the exact answers for yours.
- Thermal Paste: Many coolers ship with paste already on them. If yours doesn’t, or if you bought a tube of the fancy stuff, make sure it’s sitting on your workbench.
How Do I Get My PC Ready for the New Cooler?
With your tools at the ready, it’s time to prep your workspace. The choices you make now will determine whether this is an easy job or a frustrating one.
Should I Take the Motherboard Out of the Case?
This is the first major crossroad. Working inside a fully built PC can be a tight squeeze, forcing you to navigate around your video card, RAM, and a nest of wires. But taking the entire motherboard out means unplugging every last cable.
Here’s my two cents: If this is a new build and the motherboard is still in its box, absolutely install the CPU and cooler now. It’s a piece of cake with all that open space. If you’re upgrading an existing PC, check if your case has a big square cutout on the metal tray behind the motherboard. This cutout gives you access to install the cooler’s backplate. Try to do the installation with the motherboard in the case first. Only commit to pulling it out if you find your hands are just too cramped to work properly.
What’s the First Step in Preparing the CPU Area?
Safety first. Always. Shut the computer down properly from Windows or your OS. Once it’s completely off, hit the switch on the back of the power supply and then pull the cord from the wall outlet. Now you know for certain there’s no power going to the components.
Lay the computer on its side on a stable surface. Before you reach inside, ground yourself by touching an unpainted metal part of the PC case. This gets rid of any static electricity you’ve built up, which could otherwise zap and kill a component. Now you’re clear to take off the side panel and get a good look at the motherboard.
What if I’m Removing an Old Cooler First?
If you’re replacing a cooler, don’t just try to rip it off. The old thermal paste between the cooler and CPU creates a surprisingly strong, suction-like seal. Pulling up on a cold cooler can actually pull the CPU right out of its socket, which can easily bend the fragile pins. That’s a disaster.
Here’s a little pro tip: use heat to your advantage. Power up the PC and run a demanding program for five minutes. This warms up the CPU, which in turn softens the thermal paste. After you shut it down and unplug everything again, the seal will be much weaker.
Now you’re ready. Unplug the old fan from the motherboard. Start loosening the screws or undoing the clips that hold the cooler down, working in a crisscross pattern to ease the pressure off evenly. With everything loose, don’t just pull. Gently twist the cooler back and forth, just a few degrees. You’ll feel the seal pop. Once it wiggles freely, you can lift it straight off the CPU.
How Do I Clean the Old Gunk Off My CPU?
With the old cooler gone, you’ll see a crusty gray square of old thermal paste. Every bit of it has to go. You’re aiming for a perfectly clean, mirror-finish surface for the new paste.
Time for the isopropyl alcohol and a lint-free cloth. Put a little alcohol on the cloth—never pour it directly onto the components. Gently wipe the top metal surface of the CPU, which is called the Integrated Heat Spreader (IHS). The old paste should lift off without much of a fight.
Keep wiping with clean sections of the cloth until that metal surface is spotless and shiny. Check to make sure no paste got on the green part of the motherboard around the socket. If it did, a clean corner of your cloth can carefully dab it away. Let it air dry for a minute. The alcohol will evaporate in no time.
Now for the Big Question: How Do I Apply Thermal Paste?
This is the part everyone overthinks, but it’s simpler than you imagine. The whole point of thermal paste is to fill in the microscopic gaps between the metal of the CPU and the metal of the cooler. This creates a perfect surface for heat to travel across.
But Doesn’t My Cooler Already Have Paste On It?
Check the bottom of your new cooler. Many now come with a perfect layer of thermal paste already applied by the factory. If yours has this, you’re golden. This paste is usually good quality and perfectly fine for most builds. You can skip applying your own. Just be extremely careful not to smudge it. And please, don’t add your own paste on top of the pre-applied stuff. One layer is all you need.
What’s the Best Way to Apply My Own Paste?
If your cooler is bare or you’ve decided to use a different paste, it’s time to apply it. The internet will show you a dozen “perfect” methods. In reality, the pressure from the cooler does most of the spreading for you, so a few methods work great.
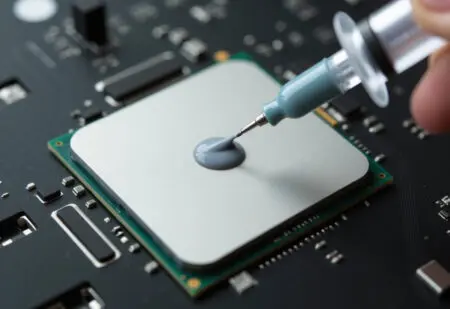
The most reliable technique is the “pea-sized dot.” Squeeze a small dot of paste, about the size of a grain of rice, right in the center of the CPU. That’s it. When you mount the cooler, the pressure will spread that dot into a perfect, thin layer.
I learned this lesson the hard way. On my very first build, I was terrified of not using enough paste, so I used way too much. I smeared a huge glob all over the CPU with a credit card. It was a disaster. Paste squished out over the motherboard, and because the layer was so thick, my temperatures were sky-high. After the shame of cleaning it all off and trying again with just one small dot, my temps dropped by a full 15°C. Trust me on this one: less is more.
How Do I Actually Mount the New CPU Cooler?
This is where you stop listening to me and start obeying your manual. The exact steps change a lot between Intel and AMD systems, and even more between brands like Noctua, Cooler Master, or be quiet!. Follow the instructions for your specific CPU socket (like LGA 1700 for Intel or AM5 for AMD).
What’s This Backplate Thing and Where Does It Go?
Most big air coolers are too heavy to just screw into the motherboard. They need a backplate for support. This is a plate that sits on the back of your motherboard, right behind the CPU. The cooler’s mounting screws go through the motherboard and anchor into this plate, creating a rock-solid foundation.
If your case has that cutout I mentioned earlier, you can just hold the backplate in place. If not, this is where you’d have to remove the motherboard from the case. Line up the holes in the plate with the holes around the CPU socket. Pay attention to the manual, as some plates are adjustable and need to be set correctly for your system.
How Do I Line Everything Up Correctly?
With the backplate on, you’ll usually screw in some standoffs or attach mounting brackets to the front of the motherboard. Now’s the time to pay really close attention to those diagrams in your manual.
I once burned 45 minutes trying to install a cooler, getting more and more frustrated because the bracket wouldn’t line up. I was sure they had sent me the wrong parts. Just as I was about to fire off an angry email, I looked at the tiny diagram one last time and realized I had the bracket flipped completely upside down. It was a humbling moment. I flipped it over, and it slotted into place perfectly. Look at the pictures.
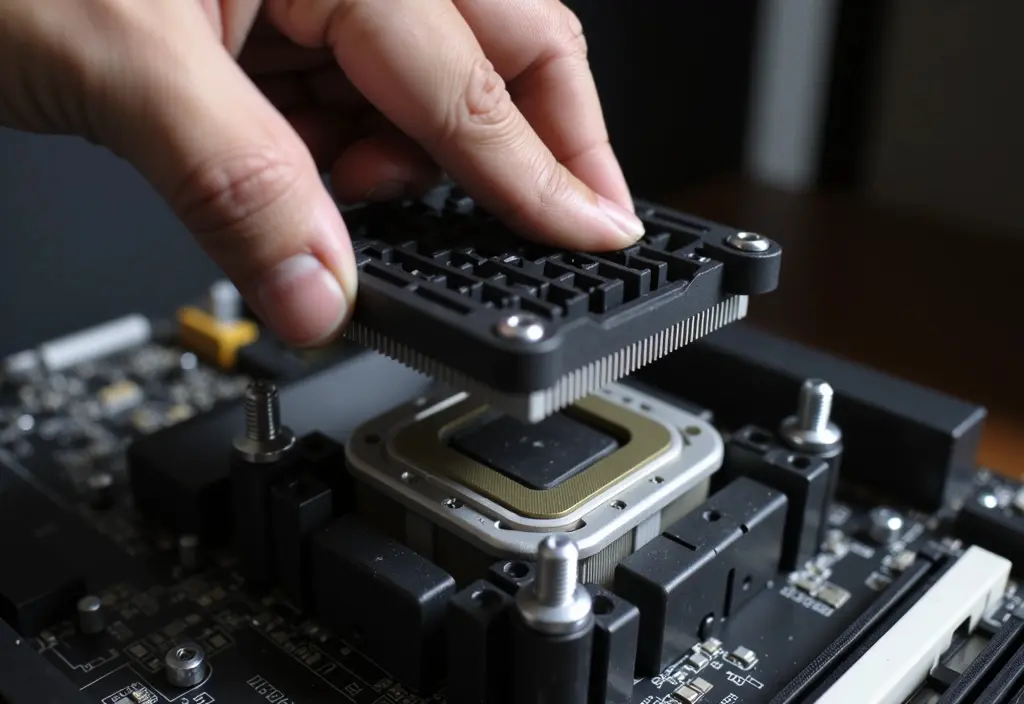
Once the brackets are secure, it’s time for the final, critical step: peel the protective plastic film off the bottom of the cooler! It’s the #1 rookie mistake. Forgetting it will give you awful temperatures. Carefully lower the cooler onto the CPU, lining up its screws with the brackets you just installed.
How Tight Should I Screw the Cooler Down?
The key here is even pressure. Don’t crank one screw down all the way. You need to use a crisscross pattern. Give the first screw a couple of turns. Then move to the screw diagonally across from it and do the same. Then the third, and finally the fourth.
Keep repeating that pattern, tightening each one a little at a time, until they all stop turning. You don’t need to be a bodybuilder. The springs on the screws are designed to apply the correct tension. Once they feel snug, you’re done. This method ensures the cooler is perfectly flat against the CPU.
It’s On! Now, Where Does This Fan Cable Go?
The heatsink is mounted, but the fan is what brings it to life. Look for a small cable coming from the fan; it will end in a 3- or 4-pin plastic connector.
Scan the motherboard right around the CPU socket. You’re searching for a specific set of pins labeled “CPU_FAN”. This is a special header just for this purpose. The motherboard uses it to control the fan’s speed and to make sure it’s running. If it doesn’t detect a fan here, it might give you a warning when you boot up, which is a good safety feature.
The connector is keyed, so it can only plug in the right way. Line it up with the header and push it on gently.
Is There Anything I Should Check Before I Close Up the Case?
You’re on the home stretch! Before you put that side panel on, take one last 60-second look around.
- Is Your RAM Happy? Look at your memory sticks. Is the cooler’s fan or heatsink touching them? This can be an issue with huge coolers and tall RAM.
- Are Cables Clear? Make sure the fan cable you just plugged in isn’t dangling where it could get hit by a spinning fan blade.
- Which Way is the Wind Blowing? Check that the fan is oriented to push air through the heatsink toward the back of your case, where your rear exhaust fan can get rid of the hot air.
- The Plastic Peel… Seriously: One last check. Are you 100% positive you peeled that clear plastic sticker off the bottom of the cooler?
How Do I Know if I Did Everything Right?
The moment of truth. The PC is back together, plugged in, and ready to go. Hit the power button. Your first stop isn’t Windows; it’s the BIOS (or UEFI).
As the computer boots, tap the key to enter setup—usually Del or F2. Inside the BIOS, look for a section called “Hardware Monitor” or “PC Health.” This page gives you a live readout of your system’s vital signs. You’re looking for the CPU temperature.
Let it sit for a minute. The idle temperature will vary, but you’re hoping to see something in the 30-45°C range. The important thing is that it is not 80°C or 90°C. If you see crazy high temps right away, shut the PC down and re-check your work. It’s almost always an issue with the mounting pressure or the thermal paste.
If the temps look good, go ahead and boot into your operating system. You can use free software like HWMonitor to keep an eye on things. To really see what your new cooler can do, run a stress test like Prime95. This will push your CPU to its limit. For more on testing methodologies, academic resources like Purdue University’s engineering pages have great information on the principles of thermal dynamics in computer hardware. As long as your temperatures under load stay well below the CPU’s maximum safe limit (usually around 95-100°C), you can call this job a success.
Congratulations, You’ve Done It!
That’s all there is to it. You’ve worked on the heart of your PC and successfully completed a major upgrade. By being patient and methodical, you’ve given your computer the cooling it needs to perform its best. The satisfaction of seeing those low, stable temperatures on the screen is one of the best parts of building your own rig. Now go and enjoy your cooler, quieter machine. You earned it.
FAQ – How to Install a CPU Cooler
How do I ensure I have properly mounted the CPU cooler and connected everything correctly?
After mounting the cooler with even pressure in a crisscross pattern and tightening all screws securely, ensure the fan cable is plugged into the CPU_FAN header on the motherboard. Double-check that there are no obstructions to RAM modules or other components, and verify that the fan is oriented to exhaust air correctly. Finally, look inside the case to confirm all cables are clear of moving parts before closing it up.
Should I remove the motherboard from the case to install a cooler?
Whether you should remove the motherboard depends on your case, cooler, and experience. If your case has a large cutout behind the CPU socket, you might be able to install the cooler with the motherboard in place. For larger coolers or if space is tight, removing the motherboard can make the process easier and safer, especially for new builders.
What tools are essential for installing a CPU cooler?
The essential tools for installing a CPU cooler include a Phillips head screwdriver, preferably with a magnetic tip, isopropyl alcohol of 90% or higher for cleaning, lint-free cloths like coffee filters for wiping the CPU surface, the CPU cooler itself along with its manual, and thermal paste if not pre-applied.
Why does my CPU need a cooler and how does it work?
Your CPU generates a significant amount of heat during operation because of its high electrical activity. Without a cooler, this heat can cause the CPU to overheat, throttle its performance, or even shut down to prevent damage. A CPU cooler acts like a radiator, dissipating heat away from the processor through fins and airflow, helping maintain optimal performance and prevent overheating.

