Is your trusty gaming PC starting to feel a bit slow? Are the latest blockbuster games looking more like a slideshow than a cinematic experience? If you’re nodding your head, you’ve come to the right place. The thought of prying open your computer case can feel like preparing for open-heart surgery, but I promise you it’s far less intimidating. This guide is your complete walkthrough on how to change graphics card, turning a daunting task into a surprisingly simple weekend project.
I remember my first GPU swap. I was upgrading to a card that could finally run Crysis (if you know, you know), and my hands were literally shaking. I was terrified I’d break something expensive. But after taking a deep breath and following a guide much like this one, I was greeted with the glorious boot-up screen. The feeling of success, and the massive performance jump that followed, was incredible.
Therefore, let’s demystify the process together. We’ll cover everything from choosing the right card to installing the final drivers. By the end, you’ll not only have a more powerful PC but also the confidence that comes with a successful DIY upgrade.
More in Graphics Cards Category
What Is the Best GPU for Gaming
What Is a Good Graphics Card for Gaming
Is It Actually Time for a Graphics Card Upgrade?
Before you rush to spend your hard-earned cash, it’s wise to confirm if the graphics card is truly the component holding you back. Sometimes, other factors can cause poor performance. So, how can you be sure a new GPU is what you need?
Are Your Games Stuttering or Showing a Low FPS?
This is the most common sign. If you’ve had to lower the graphics settings on new games from “Ultra” to “Medium” or even “Low” just to get a smooth frame rate, your GPU is likely showing its age. A consistently low Frames Per Second (FPS) rate, especially in graphically intense scenes, is a clear signal that your card is struggling to keep up with the demands of modern software.
Do You Want to Jump to a Higher Gaming Resolution?
Maybe you just bought a new 1440p or 4K monitor, but your old graphics card was really only built for 1080p gaming. Consequently, trying to run games at these higher resolutions can bring an older GPU to its knees. If you’re aiming for crisp, high-resolution visuals, an upgrade is not just a luxury; it’s a necessity.
Are You Missing Out on New Technology Like Ray Tracing?
Modern graphics cards come with game-changing features like ray tracing, which creates incredibly realistic lighting and shadows, and AI-powered upscaling technologies like NVIDIA’s DLSS or AMD’s FSR. These features can dramatically improve visual quality and performance. If your current card doesn’t support them, you’re missing out on a significant part of the modern gaming experience.
How Do I Choose the Right Graphics Card for My PC?
Alright, you’ve decided to take the plunge. Now comes the fun part: picking your new hardware. However, this is also where many people get overwhelmed. Choosing a GPU isn’t just about picking the most expensive one you can afford; it’s about finding the right fit for your specific system.
I made a mistake early in my PC-building journey by buying a card purely based on its VRAM amount, thinking more was always better. I quickly learned that overall architecture and processing power, things you see in independent benchmarks, are far more important. Don’t just read the box; read the reviews.
Will a New Graphics Card Even Fit in My PC Case?
This might seem obvious, but it’s a critical first step. Graphics cards have grown enormous over the years. You need to make sure the card you want will physically fit inside your computer case. Grab a measuring tape and check these three dimensions:
- Length: Measure from the back I/O bracket of your case to the front drive cages or fans. Compare this to the length of the card you’re considering, which is always listed on its product page. Always leave a little extra room for airflow.
- Width (Slot): Most gaming cards are “dual-slot” or even “triple-slot” designs. Look at the back of your case. The new card will need two or three empty expansion slots side-by-side.
- Height: This is less commonly an issue, but some cards are very tall. Measure from the PCIe slot on your motherboard to the side panel of your case to ensure there’s enough clearance, especially for power cables.
Is My Power Supply (PSU) Strong Enough for the New Card?
A new, powerful graphics card is hungry for electricity. Your Power Supply Unit (PSU), the component that provides power to everything in your PC, must be up to the task. If it’s not, your system might not turn on, or it could crash under load.
First, find out the wattage of your current PSU. It’s usually printed on a sticker on the unit itself. Next, look up the recommended PSU wattage for the graphics card you want to buy. This information is always on the manufacturer’s website. As a rule of thumb, it’s good to have a little more wattage than the recommendation.
Furthermore, you need to check for the correct power connectors. Modern GPUs require dedicated power from the PSU via 6-pin, 8-pin, or the newer 12-pin PCIe power connectors. Check which connectors your PSU has available and what the new card requires. I once helped a friend who was panicking because his new PC wouldn’t boot. The issue? He had forgotten to plug in the PCIe power cables to his new GPU. It’s an easy mistake to make!
Will My Motherboard and CPU Create a Bottleneck?
A “bottleneck” happens when one component is so much slower than another that it holds the faster component back. For instance, if you pair a brand-new, top-of-the-line GPU with a ten-year-old CPU, the processor won’t be able to feed the graphics card information fast enough. The result is that you won’t get the full performance you paid for.
You don’t need the absolute best CPU to avoid a bottleneck, but it should be reasonably modern. A quick search online for your CPU model paired with your desired GPU model (e.g., “Ryzen 5 5600 with RTX 4070 bottleneck”) will give you a general idea.
In addition, check your motherboard’s expansion slot. Modern cards use a PCIe 4.0 or 5.0 connection. While they are backward compatible with older PCIe 3.0 slots, you might lose a tiny bit of performance. For most people, this difference is negligible, but it’s something to be aware of.
The Pre-Flight Checklist: Getting Ready for the Swap
You’ve picked your card and it has arrived. The excitement is building! Before you start unscrewing things, let’s gather our tools and prepare the software. Proper preparation makes the whole process smoother and safer.
What Tools Will I Need for a GPU Installation?
You don’t need a massive toolbox. In fact, you probably already have everything you need.
- A Phillips Head Screwdriver: This is the only tool that’s absolutely essential. Most, if not all, screws inside a PC case will be Phillips head.
- An Anti-Static Wrist Strap (Highly Recommended): Static electricity is the silent killer of computer components. An anti-static wrist strap grounds you, preventing any accidental static discharge from frying your new GPU or other parts. They are very cheap and provide great peace of mind.
- A Flashlight: The inside of a PC case can be a dark place. A small flashlight or the light on your phone can be incredibly helpful for seeing small clips and screws.
Speaking of static, it’s crucial to handle components carefully. For anyone working with sensitive electronics, understanding how to prevent electrostatic discharge (ESD) is fundamental. As detailed in resources from universities like Purdue University, simply touching a grounded metal object before you begin can dissipate any static buildup. I always make it a habit to touch the metal part of my PC case before reaching inside. You can learn more about safe handling practices on educational sites that cover electronics safety.
Why Should I Uninstall Old Graphics Drivers First?
Before you physically remove your old card, it’s a best practice to uninstall its software drivers from your computer. This prevents potential conflicts and weird glitches when you install the new card and its drivers. You can do this through your operating system’s control panel, but for a truly clean slate, I swear by a free tool called Display Driver Uninstaller (DDU).
Using DDU is my go-to first step. I always download it, boot my PC into Windows Safe Mode, and then run the utility to wipe every trace of the old drivers. This process has saved me from countless headaches over the years by ensuring a perfectly clean installation for the new hardware.
The Main Event: How to Change Your Graphics Card Step-by-Step
The moment of truth has arrived. Take a breath; you’ve got this. We’re going to go through this one simple step at a time.
Step 1: Power Down and Prepare Your Workspace
First things first, completely shut down your computer. Don’t just put it to sleep. Once it’s off, switch the power supply off using the little switch on the back, and then unplug the main power cord from the wall. As an extra precaution, press and hold the power button on the front of the case for about five seconds. This will discharge any remaining electricity in the components. Finally, move your PC tower to a well-lit, clear workspace, like a table or the floor.
Step 2: Opening Up Your PC Case
Now, you’ll need to remove the side panel to access the internals. For most cases, this is the left-side panel (when looking from the front). It’s usually held on by two thumbscrews on the back. Unscrew them and slide the panel off. Place it somewhere safe where it won’t get scratched.
Step 3: Locating and Unplugging the Old Graphics Card
With the case open, the graphics card is usually the largest component plugged horizontally into the motherboard, about halfway down. Before you can remove it, you must disconnect the PCIe power cables running from your power supply. These cables will have a plastic clip on them that you need to press to release the plug. They can sometimes be a bit stiff, so be firm but gentle. I’ve definitely scraped a knuckle on those little plastic clips more than once, so take your time.
Step 4: How Do I Unscrew the Graphics Card from the Case?
The graphics card is secured to the back of the case at the I/O bracket (where you plug in your monitor). You’ll see one or two screws holding this bracket in place. Use your Phillips head screwdriver to remove them and keep them in a safe place. You’ll need them for the new card.
Step 5: The Trickiest Part – Unlatching the PCIe Slot
This is the step that trips up most beginners. The PCIe slot on the motherboard that holds the graphics card has a small plastic retention clip or latch at its end. This latch locks the card in place. You must release it before you can pull the card out.
You’ll need to press down or push aside this latch. It can be hard to reach, especially if you have a large CPU cooler. Be patient and use a non-conductive tool like a plastic spudger or even a chopstick if you can’t reach it with your finger. Do not use a metal screwdriver to push the latch, as you could slip and damage your motherboard. Apply gentle, steady pressure until you feel it release.
Step 6: Gently Removing the Old Graphics Card
Once the power is unplugged, the screws are out, and the PCIe latch is released, you can finally remove the card. Use two hands to grip the card firmly and pull it straight up and out of the slot. It should come out smoothly without much force. If it feels stuck, double-check that the PCIe latch is fully disengaged.
Step 7: How to Install the New Graphics Card
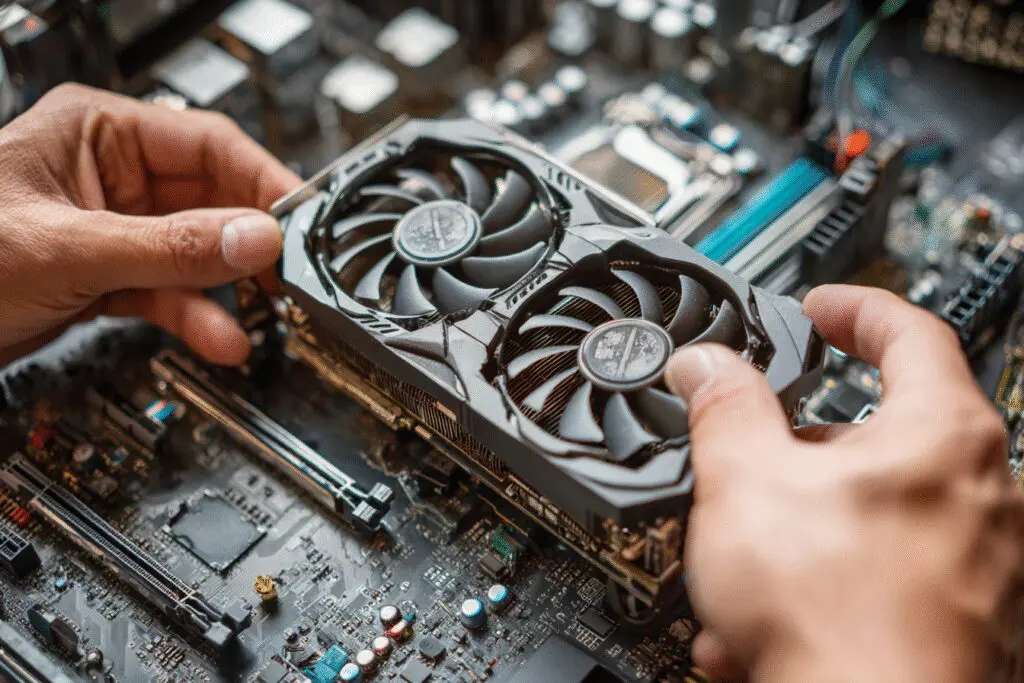
Time to install your shiny new hardware! First, make sure the PCIe latch on the empty slot is in the open position. Then, take your new graphics card, line it up carefully with the slot, and gently press it straight down. You should feel and hear a satisfying “click” as the card seats itself and the retention latch locks into place.
Step 8: Securing the New Card in Place
With the card seated in the motherboard, it’s time to secure it to the case. Re-install the screws you removed earlier into the I/O bracket. This ensures the card doesn’t sag or wobble.
Step 9: Connecting the Power Cables to Your New GPU
Your new card needs power! Take the PCIe power cables from your power supply and plug them firmly into the power connectors on your new graphics card. Make sure they click into place so you know they are fully seated. This is a critical step that is often overlooked!
Step 10: Closing Up and Reconnecting Everything
The hard part is over! Carefully slide the side panel back onto your case and secure it with the thumbscrews. Move your PC back to its usual spot. Now, reconnect your power cord, keyboard, and mouse. Most importantly, make sure you plug your monitor’s display cable into one of the ports on your new graphics card, not the ports on your motherboard. This is the single most common mistake people make after an upgrade.
The Aftermath: Software and Testing
The physical installation is complete, but we’re not quite done. We need to install the software and make sure everything is running perfectly.
What Do I Do After Installing a New Graphics Card?
With everything plugged in, it’s time to boot up. Press the power button and watch your PC come to life. Your screen resolution might look strange and blocky at first; this is completely normal because your computer doesn’t have the correct drivers installed yet.
How to Install the Latest Graphics Drivers
Once your computer has booted into the operating system, connect to the internet. Open your web browser and navigate directly to the website of your card’s manufacturer—either NVIDIA or AMD. Do not use a driver CD that may have come in the box, as those drivers are almost always outdated.
On the website, find the driver support section. You can either manually select your graphics card model or use their auto-detect tool to find the correct driver package. Download the latest version, run the installer, and follow the on-screen instructions. A “Clean Installation” or “Factory Reset” option is usually offered, which is a great choice. The installation process may cause your screen to flicker a few times. Once it’s finished, restart your computer.
How Can I Test My New Graphics Card to Make Sure It’s Working?
After the final restart, your screen resolution should look correct. Now for the real test. The best way to check if your new card is performing as expected is to push it.
- Run a Game: Fire up a graphically demanding game that you own. Go into the settings and turn everything up to the highest level. Play for a while and enjoy the smooth frame rates and beautiful visuals.
- Run a Benchmark: For a more scientific approach, you can download a free benchmarking tool like Unigine Heaven or 3DMark. These programs run a standardized graphical test and give you a score, which you can compare to similar systems online to ensure your card is performing correctly.
- Monitor Temperatures: It’s also a good idea to monitor your GPU’s temperature while it’s under load. A free tool like HWMonitor or MSI Afterburner can show you this information. Temperatures while gaming will vary, but anything under 85°C is generally considered safe.
You Did It! Enjoy Your Upgraded PC
Congratulations! You successfully navigated the entire process of a graphics card upgrade. You faced the challenge, opened up your PC, and came out victorious on the other side. That’s a fantastic accomplishment for any PC owner.
The process might have seemed complex at first, but by breaking it down into small, manageable steps, it becomes perfectly achievable. Now, you can finally enjoy all the benefits of your new hardware. So go on, crank up those graphics settings to “Ultra,” turn on all the ray tracing eye candy, and immerse yourself in the stunning worlds that modern PC gaming has to offer. You’ve definitely earned it.
Frequently Asked Questions – How to Change Graphics Card

What troubleshooting steps should I follow if my new graphics card isn’t working properly?
Ensure the GPU is correctly seated in the slot, all power connections are secure, monitor is plugged into the new card, drivers are properly installed, and check for overheating or hardware faults. Testing with benchmarking and proper troubleshooting can help identify issues.
How do I properly install a new graphics card?
You should open your PC case, unclip and remove the old GPU, insert the new card into the PCIe slot, secure it with screws, connect the necessary power cables, and then close the case before installing updated drivers and testing the performance.
What should I check before buying a new graphics card?
You should consider your budget, the compatibility with your motherboard’s PCIe slot, your power supply’s wattage and connectors, the physical fit inside your PC case, and whether your CPU can handle the new GPU without bottlenecking.
How can I tell if my current GPU is outdated and needs replacement?
If your GPU struggles with new games, lacks support for recent features like ray tracing or AI-based enhancements, or causes low performance in creative applications, it likely needs an upgrade.
Why should I consider upgrading my graphics card?
Upgrading your graphics card enhances your computer’s ability to render images, videos, and 3D graphics faster and more effectively, which is especially beneficial for gaming, creative work, and supporting new technologies.


