Did you know that over 1.8 billion people identify as PC gamers worldwide? That’s a staggering number, and it points to a simple truth: PC gaming offers an unparalleled experience in performance, customization, and control. If you’ve ever dreamed of buttery-smooth frame rates and stunning graphics that leave consoles in the dust, you’ve come to the right place. This guide will show you exactly how to build a PC gaming rig, transforming you from a spectator into a creator.
My first build was a mess of tangled cables and confusing manuals, but the moment it booted up and I launched my first game, I was hooked. It’s a journey, and this is your roadmap.
More in Hardware Category
How to Build a Gaming PC for Beginners
Why Should You Even Bother Building Your Own PC?
Let’s be honest, you could just go out and buy a pre-built gaming PC. So, why go through the trouble of building one yourself? The answer boils down to three key things: power, price, and personality.
First, when you build your own rig, you control every single component. Consequently, you can tailor the machine precisely to your needs, whether that’s for 4K gaming, competitive esports, or streaming to a live audience. You aren’t stuck with a manufacturer’s cookie-cutter configuration.
Second, it’s almost always cheaper. Companies that sell pre-built PCs have to make a profit, so they mark up the price. By sourcing the parts yourself, you cut out the middleman. I remember saving nearly $400 on my second build compared to a similarly specced pre-built machine. That’s enough cash for a top-tier monitor or a whole library of new games.
Finally, there’s the sheer satisfaction. Assembling a complex machine with your own two hands and seeing it roar to life is an incredible feeling. It’s your creation, built for one purpose: to dominate every match you play.
What’s Your Gaming Goal and How Much Should You Spend?
Before you even think about buying parts, you need a plan. The most exciting part is daydreaming about the components, but a little prep work here will save you a massive headache later. Your budget and your performance target are the two most important pillars of your build.
Think about your budget realistically. You can build a capable entry-level gaming PC for around $700-$900, a solid mid-range rig for $1,000-$1,500, and a high-end powerhouse for anything north of $1,600. It’s a spectrum. The key is to decide on a number and try your best to stick to it. I once got carried away and blew my budget on an overpriced motherboard, only to realize I had to skimp on the graphics card—the most important part! Don’t make that mistake.
Are You Aiming for 1080p Supremacy or 4K Glory?
Next, what kind of performance are you after? The games you play and the monitor you use will dictate the power you need.
- 1080p (Full HD): This is the sweet spot for most gamers, especially for competitive titles like Valorant or Apex Legends, where high frame rates (144fps+) are king. A mid-range build can easily handle this.
- 1440p (QHD): This resolution offers a significant step up in visual fidelity without the massive performance cost of 4K. It’s the new standard for immersive, single-player games.
- 4K (UHD): This is the peak of visual quality. However, running games smoothly at 4K with high settings requires a seriously powerful—and expensive—graphics card.
Your performance goal directly influences your component choices, especially the graphics card and CPU.
How Do You Avoid Bottlenecking Your Components?
“Bottlenecking” is a term you’ll hear a lot. It simply means that one component is holding back the performance of another. For example, pairing a top-of-the-line graphics card with a weak, old CPU means the CPU can’t feed the graphics card data fast enough, wasting its potential.
To avoid this, you need a balanced system. You wouldn’t put a Ferrari engine in a Honda Civic, right? The same logic applies here. Spend your money wisely across the core components to ensure they all work together in harmony.
The Shopping List: Choosing Your Core Components
Now for the fun part: picking your hardware. This is where your dream machine starts to take shape. Let’s break down each essential component.
What Are the Brains of the Operation? Choosing a CPU
The Central Processing Unit (CPU) is the brain of your computer. It handles all the instructions, calculations, and logic that make your games and operating system run. The two main players in the CPU market are Intel (Core i5, i7, i9) and AMD (Ryzen 5, 7, 9).
For a pure gaming build, you don’t necessarily need the most expensive CPU on the market. A modern mid-range CPU, like an Intel Core i5 or an AMD Ryzen 5, is more than enough to handle any game you throw at it. The extra money is often better spent on a more powerful graphics card. When looking at CPUs, pay attention to clock speed (measured in GHz) and core count. For gaming, higher clock speeds are generally more important than a massive number of cores.
The Graphics Card: Where the Real Magic Happens, Right?
Absolutely. The Graphics Processing Unit (GPU), or graphics card, is the single most important component for gaming performance. It’s responsible for rendering all the beautiful images you see on your screen. This is where you should allocate the largest portion of your budget.
NVIDIA (GeForce RTX series) and AMD (Radeon RX series) are the two giants in this space. Both make fantastic cards at every price point. When choosing a GPU, the main thing to look for is its performance in gaming benchmarks at your target resolution (1080p, 1440p, or 4K). You can find thousands of these reviews on YouTube and tech websites. Don’t just look at the raw specs; look at real-world gaming performance. I spent three full evenings just watching benchmark videos before settling on my last GPU. It’s time well spent.
How Do You Pick a Motherboard Without Getting Overwhelmed?
The motherboard is the central nervous system of your PC. It’s the circuit board that connects everything—your CPU, GPU, RAM, and storage—so they can communicate. Choosing one can seem daunting because there are so many options.
Here’s how to simplify it:
- CPU Socket: The motherboard must have the correct socket for your chosen CPU (e.g., LGA 1700 for modern Intel, AM5 for modern AMD). They are not interchangeable.
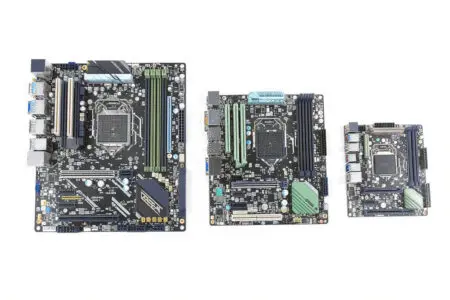
- Size (Form Factor): Motherboards come in different sizes. ATX is the standard full size, offering lots of room for expansion. Micro-ATX and Mini-ITX are smaller, for more compact builds.
- Features: Think about what you need. How many USB ports? Do you need built-in Wi-Fi? How many storage drives do you plan to install?
You don’t need a $500 motherboard for a great gaming experience. A solid, mid-range board from a reputable brand like ASUS, Gigabyte, or MSI will have all the features you need. For a deeper dive into motherboard components, the Computer Science department at Stanford University has some excellent introductory materials on computer architecture.
Is More RAM Always Better for Gaming?
Random Access Memory (RAM) is your PC’s short-term memory. It holds the data your computer is actively using, allowing for quick access. For gaming today, 16GB is the recommended amount. It provides plenty of headroom for modern games and multitasking (like having Discord or a web browser open in the background).
While 32GB is becoming more common for high-end builds, it’s not strictly necessary for most gamers and the performance uplift is minimal. When choosing RAM, you’ll also see a speed rating (e.g., 3200MHz, 3600MHz). Faster RAM can provide a small performance boost, especially with AMD Ryzen CPUs.
SSD vs. HDD: Does it Really Make a Difference for Load Times?
Yes, it makes a world of difference! Your storage drive is where your games, operating system, and files are permanently stored. There are two main types: Hard Disk Drives (HDDs) and Solid State Drives (SSDs).
- HDDs: These are older, mechanical drives. They offer large amounts of storage for a low price but are very slow.
- SSDs: These use flash memory, like a giant USB stick. They are incredibly fast, meaning your PC will boot in seconds and game loading times will be drastically reduced.
My honest advice? Your primary drive, the one with your operating system and favorite games, must be an SSD. The difference in responsiveness is something you have to experience to believe. I remember upgrading from an HDD to an SSD for the first time; it felt like I had bought an entirely new computer. You can always add a larger, cheaper HDD later for mass storage of media files or less-played games.
Why is the Power Supply Unit (PSU) So Important?
The Power Supply Unit (PSU) is the unsung hero of your PC. It takes electricity from your wall outlet and converts it into the proper voltages for all your components. This is not a component you should ever cheap out on. A low-quality PSU can be inefficient, unreliable, and in the worst-case scenario, it can fail and take other components with it.
Look for a PSU from a reputable brand (like Corsair, SeaSonic, or EVGA) with an 80 Plus Bronze rating or higher. This rating indicates its energy efficiency. Make sure it provides enough wattage for your system—you can use an online PSU calculator to estimate your needs. It’s always a good idea to get a little more wattage than you need to leave room for future upgrades.
Choosing a Case: More Than Just a Pretty Box?
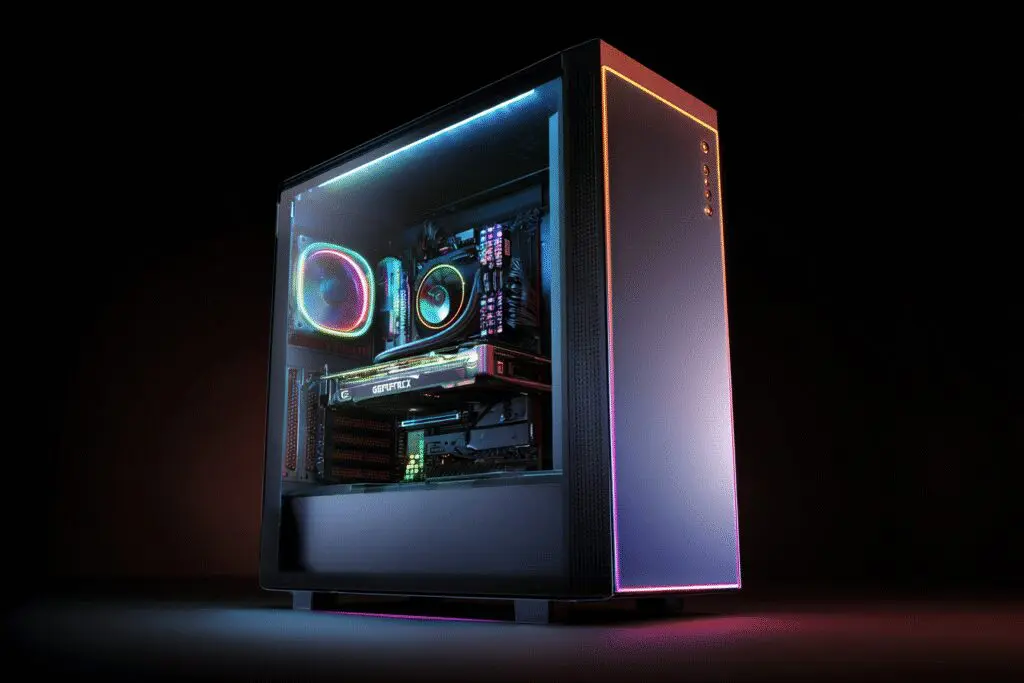
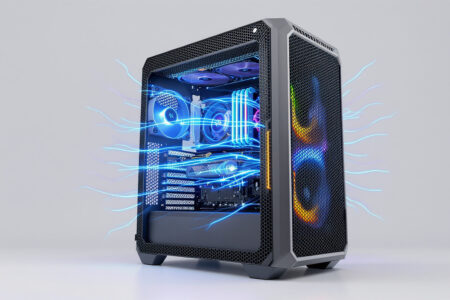
The case is what houses all your expensive components. While aesthetics are certainly a factor, its primary job is to protect your hardware and provide adequate airflow to keep everything cool. Modern games push your CPU and GPU hard, and they generate a lot of heat. Good airflow is critical for performance and longevity.
Look for a case with mesh front panels and multiple fan mounts. Read reviews and see what people say about its thermal performance and how easy it is to build in. A case with good cable management features will also make the building process much cleaner and more enjoyable.
The Assembly: Let’s Build This Thing!
You’ve done your research and your parts have arrived. Now it’s time to build. This process can take a few hours, especially if it’s your first time. I remember my first build took me a whole Saturday, from unboxing to booting up. Take your time, stay organized, and enjoy the process.
Before You Start: What Tools Do You Absolutely Need?
You don’t need a massive toolbox. In fact, you really only need a few things:
- A #2 Phillips head screwdriver (preferably with a magnetic tip).
- Zip ties or Velcro straps for cable management.
- A pair of wire cutters or scissors to snip the zip ties.
- A clear, well-lit workspace.
That’s it. Building a PC is often described as adult LEGOs, and it’s a fitting comparison.
The Step-by-Step Guide to Assembling Your PC Gaming Rig
Every build is slightly different, but the general order of operations is usually the same. Always refer to your motherboard and component manuals! They are your ultimate guide.
- Prep the Motherboard: The first step is to work on the motherboard outside of the case. Install the CPU into its socket (be very careful with the pins!), then install the RAM sticks into their slots. You’ll hear a satisfying click. Lastly, install your M.2 SSD if you have one.
- Mount the Motherboard: Carefully install the motherboard into the case, screwing it into the pre-installed standoffs.
- Install the Graphics Card: This is usually the largest component. Slot it into the top-most PCIe x16 slot on your motherboard until it clicks into place.
- Install the Power Supply: Screw the PSU into its designated spot, usually at the bottom rear of the case.
- Connect the Cables: This is the part that can look intimidating, but it’s just a matter of matching shapes. Connect the main 24-pin motherboard power, the 8-pin CPU power, and the PCIe power cables to your graphics card. Then, connect your storage drives and case fans.
- Cable Management: Before you close up the case, take some time to route your cables neatly. Use those zip ties! Good cable management isn’t just for looks; it also improves airflow.
I’ll never forget the feeling of slight panic on my first build when I pressed the power button and nothing happened. I had forgotten to flip the switch on the back of the power supply. It’s usually a simple mistake, so don’t panic if it doesn’t boot on the first try. Double-check all your connections.
The Final Boss: Software Installation and Setup
You’ve built the hardware; now you need to bring it to life with software. Connect your keyboard, mouse, and monitor, and power it on.
How Do You Install Windows on a New PC?
You’ll need a USB drive with the Windows installation media on it. You can create this on another computer using Microsoft’s official Media Creation Tool. Plug the USB drive into your new PC, turn it on, and enter the BIOS (usually by pressing the DELETE or F2 key on startup). In the BIOS, set the USB drive as your primary boot device. From there, the Windows installer will guide you through the rest of the process.
Where Do You Find All the Necessary Drivers?
Once Windows is installed, you need to install drivers. These are small pieces of software that allow your operating system to communicate with your hardware. The most important one is your graphics card driver. Go directly to the NVIDIA or AMD website to download the latest version for your specific card. You should also go to your motherboard manufacturer’s website to download the latest chipset drivers.
After that, you’re ready. Install your favorite game launcher, download your games, and witness the power of a machine you built with your own two hands. It’s a rite of passage, and the reward is a gaming experience that is truly your own. Building a PC isn’t just about getting better frame rates; it’s about taking complete ownership of your passion. Now go dominate.
Frequently Asked Questions – How to Build a PC Gaming Rig

What are important factors to consider for cooling and case selection?
Choose a case that supports your motherboard size and has good airflow, such as mesh front panels and multiple fan slots. Decide between air cooling or liquid cooling based on your performance needs, case compatibility, and aesthetic preference, ensuring your CPU cooler fits your case and provides efficient cooling.
How do I pick the right motherboard for my gaming build?
Select a motherboard with the correct socket type to match your CPU, such as LGA 1700 for Intel or AM5 for AMD. Consider the form factor (ATX, Micro-ATX, Mini-ITX), RAM slots, and connectivity options like USB ports, M.2 slots for SSDs, and built-in Wi-Fi to ensure it meets your future upgrade plans.
What should I consider when choosing a graphics card for gaming?
Choose a graphics card based on VRAM, with 8GB suitable for 1080p gaming and 12GB or more for 1440p or 4K gaming. Look at independent benchmarks to assess real-world performance, and select models from NVIDIA GeForce RTX series or AMD Radeon RX series based on your gaming resolution and desired graphics quality.
How do I select the right CPU for my gaming PC?
The CPU, or processor, is the brain of your computer. For gaming, look for a CPU with at least 6 cores, such as AMD Ryzen or Intel Core chips. Ensure that the CPU matches the socket type of your motherboard, like AM5 for AMD Ryzen 7000 series, to ensure compatibility.
What are the main benefits of building my own PC gaming rig?
Building your own PC gaming rig allows you to choose every component, ensuring the parts are tailored to your gaming needs and budget. It often gives you better performance for your money compared to pre-built systems and provides valuable knowledge for future upgrades and troubleshooting.


