Did you know that the global PC gaming market is projected to reach over 47 billion U.S. dollars by 2027? That’s a massive community of players, and many of them are running on machines they built themselves. If you’ve ever looked at your current setup and wondered if you could do better, the answer is a resounding yes. The idea of building a computer can seem incredibly daunting, like a technical puzzle with a thousand tiny, expensive pieces. But I’m here to tell you it’s more like building with LEGOs for adults. This guide on how to build a gaming PC for beginners is designed to demystify the process, cut through the jargon, and walk you through every step.
I still vividly remember my first build over a decade ago. My hands were literally shaking as I tried to seat the processor into the motherboard. I was so worried I was going to bend one of the fragile pins and turn a $200 chip into a fancy paperweight. But when I finally connected everything, pressed the power button, and saw the screen light up… that feeling of accomplishment was absolutely unbeatable. You made this. It’s yours. And it’s going to play your favorite games exactly the way you want.
More in Hardware Category
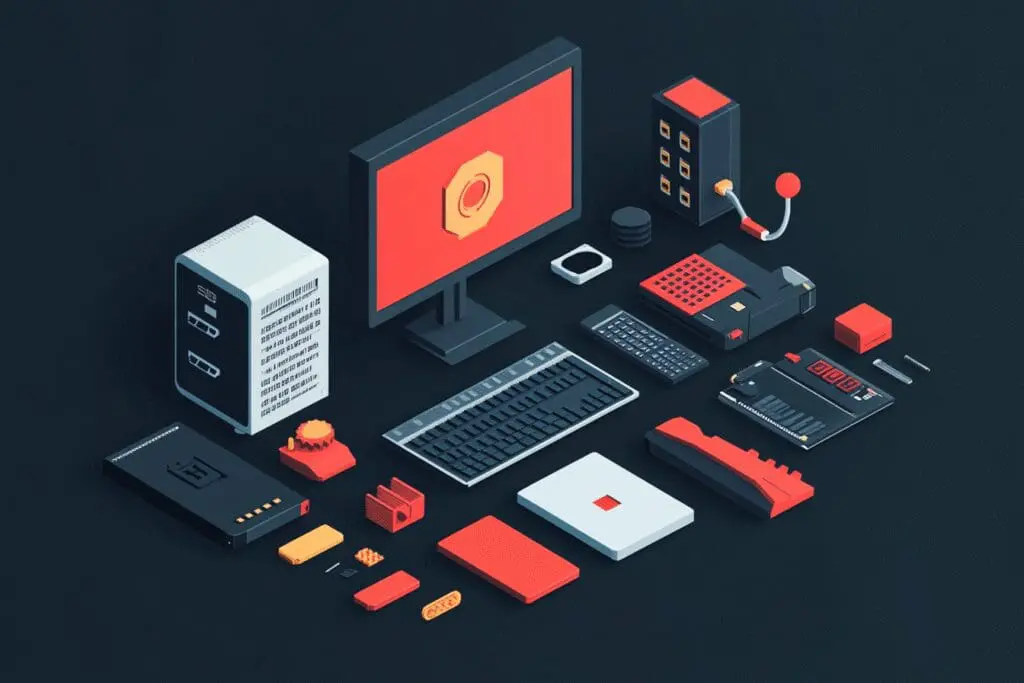
What Parts Do I Need to Build a Gaming PC
So, Why Should You Even Bother Building Your Own Gaming PC?
In a world filled with slick pre-built options from major brands, it’s a fair question to ask. Isn’t it just easier to click “buy” and have a box arrive at your door? Absolutely. However, the convenience of a pre-built machine often comes with hidden costs and compromises that you might not notice until it’s too late.
Think of it this way: buying a pre-built PC is like buying a suit off the rack. It might fit okay, and it’ll certainly do the job, but it was made for the average person, not specifically for you. Building your own PC, on the other hand, is like getting a suit custom-tailored. Every single piece is chosen by you, for you, to fit your exact needs and budget.
What Are the Real Benefits of a Custom Build?
The advantages go far beyond just bragging rights. When you decide to build your own machine, you unlock a level of control and value that pre-built systems simply can’t match. Consequently, you’re not just buying a product; you’re investing in a superior gaming experience.
- You Save Money: By sourcing the parts yourself, you cut out the middleman and the labor costs that companies charge for assembly. This often means you can build a more powerful PC for the same price as a weaker pre-built one.
- Total Customization: You get to pick every single component. Do you want a super-fast processor for strategy games? Or would you rather put more of your budget into a top-tier graphics card for stunning visuals? The choice is entirely yours.
- No Bloatware: Pre-built PCs almost always come loaded with unnecessary trial software and programs that slow down your system from day one. A custom build starts with a clean slate.
- Understanding Your Machine: You’ll know your PC inside and out. If something goes wrong or when it’s time to upgrade, you’ll have the confidence to open it up and do it yourself.
- Future-Proofing: You can choose a motherboard and power supply that can handle future upgrades, making it easier and cheaper to keep your PC up-to-date down the line.
I once had a friend buy a pre-built PC that looked great on paper. It had a fantastic processor and graphics card. But the company saved money by using a cheap, unreliable power supply. It’s like buying a brand-new sports car but the manufacturer puts flimsy bicycle tires on it to save a few bucks. It’s a bottleneck and a potential point of failure. That’s a compromise you would never willingly make for yourself.
What Are the Essential Components for a Gaming PC Build?
Before you can start building, you need to go shopping. A gaming PC is essentially a team of specialized components working together. Each part has a critical role to play, and understanding what each one does is the first step toward building a balanced and powerful machine. Let’s break down the core members of the team.
The Brains of the Operation: What is a CPU (Central Processing Unit)?
The CPU is the primary processor of your computer. In short, it’s the component that performs most of the calculations and executes instructions. For gaming, a good CPU ensures smooth gameplay, especially in titles that rely on complex physics or have many things happening on screen at once, like large-scale strategy games.
The main decision you’ll face is choosing between the two major manufacturers: Intel and AMD. For years, this was a one-sided fight, but today, it’s more like Ford vs. Chevy. Both companies are producing incredibly powerful and competitive processors. Your best bet is to look at current benchmarks for the games you play and pick the one that offers the best performance for your budget.
The Visual Powerhouse: How Important is the GPU (Graphics Processing Unit)?
If the CPU is the brain, the GPU is the soul of a gaming PC. This is the component that takes data from the CPU and turns it into the images you see on your monitor. For this reason, the graphics card is almost always the single most expensive part of any gaming build, and rightfully so.
A powerful GPU is the difference between playing a game on low settings with a choppy frame rate and experiencing it in glorious 4K resolution with all the visual bells and whistles turned on. It’s what allows you to see every single scale on a dragon’s back or the individual blades of grass in a vast open world. The two players in this space are NVIDIA (with their GeForce line) and AMD (with their Radeon line). Just like with CPUs, the “best” one often comes down to your budget and the specific games you’re targeting.
The Foundation: What Does the Motherboard Do?
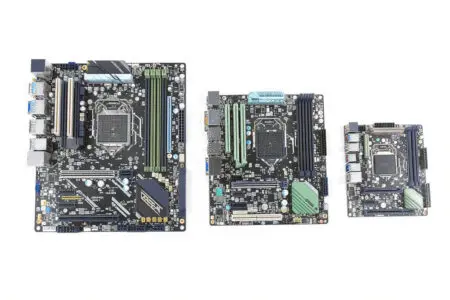
The motherboard is the central nervous system of your PC. It’s a large circuit board that everything else plugs into, allowing all the components to communicate with each other. It doesn’t directly impact your frame rate like a GPU, but it determines the capabilities and future upgrade potential of your system.
When choosing a motherboard, the most important factor is compatibility. You need to make sure its “socket” matches your chosen CPU (for example, you can’t put an AMD CPU in a motherboard made for Intel chips). You also need to consider how many RAM slots it has, what kind of storage drives it supports, and its overall size. It’s tempting to save money here, but a good motherboard provides a stable foundation for your entire build.
Short-Term Memory: Why Do You Need RAM (Random Access Memory)?
RAM is your computer’s short-term memory. It holds the data for the programs and games that are currently running. Think of it as your desk space. The more RAM you have, the more things you can have open and running at once without your system slowing down.
For modern gaming, 16GB of RAM is generally considered the sweet spot. It provides enough memory for most games and allows you to have other applications like Discord or a web browser open in the background. If you’re on a tight budget, you can start with 8GB, but you may find it limiting in newer titles.
Long-Term Storage: What’s the Difference Between an SSD and a Hard Drive?
Your storage drive is where your operating system, programs, and games are permanently stored. For years, the standard was the Hard Disk Drive (HDD), which uses spinning platters. Today, the Solid State Drive (SSD) is king.
- SSD (Solid State Drive): Uses flash memory, similar to a USB drive. It’s significantly faster than an HDD, meaning your PC will boot up in seconds, and your games will have drastically reduced loading times.
- HDD (Hard Disk Drive): A mechanical drive that is slower and cheaper. It’s still a good option for storing large files like movies or a huge backlog of games you don’t play often.
For any modern build, an NVMe M.2 SSD for your operating system and favorite games is non-negotiable. I mean it. The speed increase is so dramatic that going back to a PC that boots from a traditional hard drive feels like walking through molasses. It’s the single biggest quality-of-life improvement you can make.
The Unsung Hero: Why Can’t You Skimp on the PSU (Power Supply Unit)?
The PSU takes power from your wall outlet and converts it into the proper voltage for all your components. It is, without a doubt, the most underrated part of any PC build. It’s easy to look at the power supply as a boring box and try to save as much money as possible on it. This is a huge mistake.
A cheap, low-quality power supply can be inefficient, noisy, and, in a worst-case scenario, it can fail and take other, more expensive components with it. This is the one part you should never compromise on. Stick to reputable brands and look for a unit with an “80 Plus” efficiency rating (Bronze is a good starting point) to ensure it delivers clean, stable power to your expensive new parts.
The Home for Your Parts: How Do You Choose a PC Case?
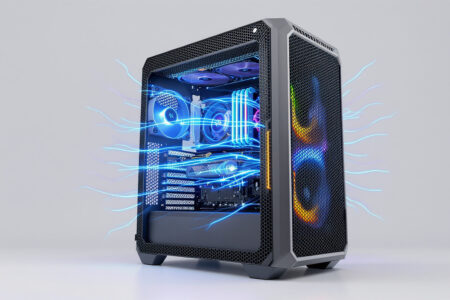
Finally, you need something to put all these components in. The PC case protects your hardware and, more importantly, plays a huge role in cooling. While aesthetics are a factor, your primary concern for a first build should be two things: airflow and ease of building.
Look for a case that has a mesh front panel and includes at least a couple of fans. Good airflow keeps your components cool, which allows them to run at their peak performance. Also, consider the size. A mid-tower case is usually a great starting point for beginners, as it provides plenty of room to work in without being unnecessarily massive. My first case was this tiny, cramped thing that looked cool but was an absolute nightmare to build in. I’m pretty sure I still have scars on my knuckles from its sharp metal edges. Don’t make my mistake; give yourself some room to work.
What Tools and Prep Work Do I Need Before I Start Building?
Okay, the parts are ordered and have arrived in a glorious pile of cardboard boxes. The excitement is real. Before you tear everything open, let’s take a moment to prepare your workspace and gather your tools. A little bit of prep work now will make the entire building process smoother and less stressful.
Here is a simple list of what you will need:
- A Phillips Head Screwdriver: This is your primary tool. A magnetic tip is an absolute lifesaver when you inevitably drop a tiny screw into a hard-to-reach corner of the case.
- Zip Ties or Velcro Straps: These are for cable management later on. They’ll help you turn a potential “spaghetti monster” of wires into a clean, organized build.
- A Clear, Well-Lit Workspace: You’ll want a large table or desk where you can lay everything out. Good lighting is crucial for reading the tiny labels on the motherboard.
- Your Component Manuals: Do not throw these away! The motherboard manual, in particular, is your bible for the next few hours. It has diagrams showing you where every single cable goes.
- An Anti-Static Wrist Strap (Optional): This is a strap you wear that connects to a metal part of the PC case to keep you grounded. While the risk of you damaging a component with static electricity is relatively low, a wrist strap provides complete peace of mind for about ten dollars. If you don’t have one, just make a habit of touching the bare metal of your PC case every few minutes to discharge any static buildup.
How Do You Actually Put the Gaming PC Together?
This is the moment. It’s time to assemble your creation. The key here is to take your time and follow a logical order. We’re going to do as much as we can outside the case first, which makes things much easier to handle.
Step 1: Preparing the Motherboard Outside the Case
Find the anti-static bag your motherboard came in and place the board on top of its box. This gives you a safe, non-conductive surface to work on.
- Install the CPU: Locate the CPU socket on the motherboard. There will be a small lever next to it. Lift the lever, which will open the retention bracket. Look for a small triangle on one corner of your CPU and a matching triangle on the socket. This is your guide. Line them up and gently place the CPU into the socket. It should drop in without any force. Once it’s seated, lower the lever back down and lock it in place.
- Install the RAM: Find the RAM slots on your motherboard. Push down on the clips at either end to open them. Align the notch on the bottom of your RAM stick with the notch in the slot. Then, press down firmly on both ends of the stick until you hear two satisfying clicks. That’s it; your RAM is installed.
- Install the M.2 SSD: If you have an M.2 drive, locate the slot on the motherboard. It’s small and looks a bit like a RAM slot. There will be a tiny screw holding a standoff in place. Unscrew it, slide the M.2 drive into the slot at an angle, then press it down and secure it with that same tiny screw.
Step 2: Getting the Case Ready for Action
Now, set the motherboard aside and grab your case. Open up both side panels to give yourself full access.
- Install the Motherboard Standoffs: Standoffs are small brass screws that you install in the case’s motherboard tray. These prevent the back of your motherboard from touching the metal case and causing a short circuit. Your case manual will show you exactly which holes to use for your motherboard’s size (ATX, Micro-ATX, etc.).
- Install the I/O Shield: This is the thin, rectangular piece of metal that came with your motherboard. It frames all the ports on the back of your PC (USB, Ethernet, etc.). You need to snap this into the back of your case from the inside. Do this before you install the motherboard. We have all, at one point or another, built an entire PC only to realize we forgot this step. It’s a rite of passage, but one you can easily avoid.
Step 3: Bringing it All Together Inside the Case
Carefully pick up your motherboard assembly and lower it into the case, aligning the center standoff with the hole in the motherboard and making sure the ports go through the I/O shield. Now, secure the motherboard to the standoffs with the provided screws. Don’t overtighten them—just snug is perfect.
Next, install the graphics card. Find the top-most long PCIe slot on your motherboard, open its retention clip, and remove the corresponding metal brackets from the back of the case. Then, line up the card and press it firmly into the slot until it clicks into place, just like the RAM. Secure it to the case with screws.
Finally, install the power supply. It usually goes in the bottom of the case and is secured with four screws from the back.
Step 4: The Spaghetti Monster – How Do You Connect All the Cables?
This can be the most intimidating part, but your motherboard manual is your best friend here.
- Main Power: Find the large 24-pin connector from your power supply and plug it into the corresponding slot on the motherboard. Then find the 8-pin CPU power cable and plug it into the top-left corner of the board.
- GPU Power: Your graphics card will likely need one or two 6+2 pin PCIe power connectors from the power supply.
- Front Panel Connectors: These are the tiny, frustrating little wires for your case’s power button, reset button, and indicator lights. I’ll be honest, even after building dozens of PCs, I still have to look at the manual’s diagram for these. They are small and fiddly. Take your time, use a flashlight if you need to, and connect them one by one.
Step 5: Cable Management – Does It Really Matter?
After everything is plugged in, you’ll have a lot of excess wiring. The process of tidying this up is called cable management. While it might seem purely cosmetic, it’s actually important for airflow. A big nest of cables can block your fans and cause your components to run hotter.
You don’t need to make it look perfect on your first try. Simply use those zip ties or velcro straps to bundle cables together and route them through the back of the case, out of the main chamber. The goal is just to create a clear path for air to flow from your front intake fans, over your components, and out the back exhaust fan.
What Happens After the Last Screw is Tightened?
You’ve done it. All the parts are in, all the cables are connected. Now for the moment of truth. Plug in the power cord, your monitor, keyboard, and mouse. Take a deep breath, and press the power button on the case.
How Do I Get Into the BIOS?
If all goes well, the fans will spin to life and you’ll see a message on your screen from the motherboard manufacturer. This is called the POST (Power-On Self-Test). As soon as you see this, start tapping the “Delete” or “F2” key on your keyboard. This will take you into the BIOS (or more accurately, UEFI on modern boards).
The BIOS is the low-level software that controls your motherboard. You don’t need to change much here. Just take a look around and confirm that it is recognizing your CPU, your RAM (and the correct amount), and your storage drive. If it sees all those things, you’re golden.
How Do I Install Windows (or Another OS)?
To install an operating system, you’ll need to create a bootable USB drive. You can do this on another computer using Microsoft’s official Media Creation Tool, which is a free download. Once you have your USB stick ready, plug it into your new PC and restart it. It should automatically boot from the USB drive and begin the Windows installation process. Just follow the on-screen prompts, and in about 20 minutes, you’ll be looking at a fresh Windows desktop.
Once you are up and running, it’s a good idea to ensure your new computer is secure. Simple practices can make a big difference. For a comprehensive overview, Stanford University’s IT department provides a great guide on how to secure your computer, which is an excellent next step.
My PC Boots and Windows is Installed… Now What?
Congratulations! You have successfully built a fully functional gaming PC. The hardest part is over. Now for the fun stuff.
What Are the First Things You Should Do on a New Gaming PC?
Before you jump into a game, there are a few final steps to make sure your system is running optimally.
- Install Drivers: This is the most important step. You need to install the software that lets your hardware communicate properly with the operating system. The most critical one is your GPU driver. Go directly to the NVIDIA or AMD website to get the latest version for your specific card.
- Run Windows Update: Let Windows download and install all the latest updates to ensure your system is secure and stable.
- Install Your Software: Download your favorite web browser, communication apps like Discord, and of course, your game launchers like Steam or the Epic Games Store.
- Download a Game: The time has come. Pick a game, hit download, and prepare to see it run better than ever before.
That first time you launch a game on a machine you built with your own two hands is a moment you won’t forget. It’s not just another appliance anymore; it’s your gaming PC. You know every component inside it, every cable you routed. There’s a connection there that you’ll never get from a pre-built machine.
Was Building Your Own Gaming PC Worth It?
Absolutely. The process might seem complex from the outside, but it’s a rewarding journey that teaches you a valuable skill, saves you money, and gives you a product that is perfectly tailored to you. You’ve tackled a technical challenge and come out the other side with a powerful machine that you understand completely.
So if you’re on the fence, I encourage you to take the plunge. Watch some videos, read some guides, and plan your build. The world of PC building is waiting for you, and it’s a lot more accessible and welcoming than you might think. Welcome to the club.
Frequently Asked Questions – How to Build a Gaming PC for Beginners

How can beginners troubleshoot common problems during PC building?
Beginners should double-check connections, ensure all parts are properly seated, remember to install the I/O shield before mounting the motherboard, apply the correct amount of thermal paste, and consult online communities such as r/buildapc or YouTube tutorials for guidance.
What is the proper order of assembly when building a gaming PC?
Start with preparing your workspace, install the CPU and RAM outside the case, mount the motherboard inside the case with standoffs and I/O shield, install storage drives, add the graphics card, connect the power supply and cables, then perform a first boot to check everything before installing the OS.
What are the main parts of a PC that beginners should understand?
Key components include the CPU (the PC’s brain), motherboard (the system’s backbone), RAM (short-term memory), GPU (graphics card for visuals), storage drives like SSDs and HDDs, power supply unit, and the case that houses all parts.
What are the essential tools needed for building a gaming PC as a beginner?
The core tools include a Phillips Head screwdriver, zip ties or Velcro straps for cable management, and optionally, an anti-static wrist strap and a headlamp or flashlight to ensure safety and visibility during assembly.
Why is learning to build a gaming PC beneficial for beginners?
Learning to build a gaming PC allows you to create a machine tailored to your needs, save money, and gain valuable technical skills that enhance your understanding and appreciation of computer technology.


