Putting together a new PC is a special kind of thrill. I’ll never forget my first build. The sheer excitement of pulling each part from its box, that new-electronics smell, the low-key fear that I’d break something. I had spent weeks buried in research, comparing motherboards and RAM speeds until my eyes blurred.
But one tiny, seemingly minor step almost brought the whole project to a halt: applying thermal paste. This little tube of gray goo felt insignificant, but every guide I read insisted it was the key to the whole operation. And they were right. Learning how to apply thermal paste to a CPU is more than just a step in a manual; it’s the thing that ensures your expensive processor runs cool, quiet, and at its peak for years.
It’s a straightforward job, but it’s also one surrounded by a surprising amount of bad advice. Get it right, and your CPU will hum along happily. Get it wrong, and you’re looking at a future of random shutdowns, laggy performance, and a processor that’s slowly cooking itself to death. Don’t sweat it, though. I’ve made the messes and learned the lessons for you. This guide will walk you through everything, from cleaning off the old gunk to mounting your cooler like a pro.
More in Hardware Category
ATX vs. Micro-ATX vs. Mini-ITX
What Are the Quietest PC Cases for Gaming
Key Takeaways
- A Clean Slate is Everything: Before you do anything else, you have to clean the CPU’s surface and the cooler’s base. Use 90%+ isopropyl alcohol and a lint-free cloth. No exceptions.
- Seriously, Less is More: The most common mistake is globbing on way too much paste. A single, pea-sized dot in the middle is all you need for most CPUs. This keeps it from oozing out and creates the thinnest possible layer for the best heat transfer.
- Stick With the Dot: For newcomers and veterans, the central dot method is the most reliable way to go. It lets the cooler’s own pressure spread the paste evenly and pushes out pesky air bubbles.
- Mount it Right: When you install the cooler, press it straight down. No sliding, no twisting. Tighten the screws in a star pattern to make sure the pressure is even.
- Fresh Paste Only: Never, ever reuse thermal paste. If you take a cooler off, you must clean both surfaces and apply a fresh coat. And please, for the love of all that is holy, peel the plastic film off the bottom of a new cooler.
So, What Exactly Is This Goop We Call Thermal Paste?
At its heart, thermal paste is just a special kind of grease that’s really good at conducting heat. Its only purpose in life is to fill in the impossibly small imperfections on the top of your CPU and the bottom of your CPU cooler.
You might look at those two metal surfaces and think they’re perfectly flat. They certainly look it. But zoom in with a microscope, and you’d see a landscape of tiny canyons and mountains. When you press those two surfaces together, you trap little pockets of air in all those gaps. Air is a fantastic insulator. That’s great for your house, but terrible for your computer. It means the heat from your CPU gets stuck, unable to make the jump over to the cooler where it can be carried away.
Thermal paste is the solution. It’s a conductive filler that squishes into every last crack and crevice, forcing out all the air. This creates a perfect, unbroken bridge for heat to travel across. The result is a much cooler, happier processor.
Do I Really Need to Bother With This Step?
Let me be clear: yes. Absolutely. This is not optional. Skipping this or doing a sloppy job isn’t a small mistake—it’s a recipe for poor performance and, eventually, a damaged CPU.
Without that crucial layer of paste, the heat your processor generates has nowhere to escape. It builds up fast. Modern CPUs are smart enough not to destroy themselves immediately. When they get too hot, they start “thermal throttling.” That’s a fancy term for the CPU deliberately slowing itself down to cool off. If you’re a gamer, your frame rates will tank. If you’re an editor, your video renders will crawl. The whole computer will feel like it’s running through mud.
If the temperature keeps climbing, the PC will just shut itself down to prevent a catastrophe. I once helped a buddy whose brand-new gaming rig kept crashing. He was convinced the power supply was bad. I popped it open, took off the CPU cooler, and found nothing. It was bone dry. He’d completely forgotten the thermal paste. We cleaned it, put on a fresh dot of paste, and the PC ran perfectly. That tiny bit of goo was the only thing wrong.
Over time, constantly running hot will shorten your CPU’s lifespan. Heat is the mortal enemy of electronics. A proper thermal paste application is your number one weapon against it.
What Tools Do I Need to Get Started?
You don’t need a complicated toolkit for this job. The essentials are cheap and easy to find. Just make sure you have everything ready before you start, so you’re not scrambling for something with a half-disassembled PC in front of you.
Here’s your shopping list:
- Good Thermal Paste: Don’t cheap out. Go with a trusted brand like Arctic, Noctua, or Thermal Grizzly. A good paste performs better and lasts longer.
- Isopropyl Alcohol (90% or higher): This is for cleaning. The higher percentage means it evaporates quickly and leaves no residue. You can get it at any drugstore.
- Lint-Free Cloths: Microfiber cloths are ideal. In a pinch, a standard coffee filter works wonders because it won’t leave any fuzz behind. Steer clear of paper towels; they shred and leave a mess.
- Cotton Swabs: Handy for cleaning up small smudges around the edges.
- Nitrile Gloves (Optional but Recommended): This stuff can get messy. Gloves keep the paste off your hands and the oils from your skin off the clean CPU.
How Do I Prepare My CPU for a Fresh Coat?
Getting the surfaces perfectly clean is the most important part of this whole process. If you have a brand-new CPU and cooler right out of the box, you can usually skip this, but always give them a quick inspection for dust. If you’re replacing a cooler or just doing some maintenance, cleaning is mandatory.
What’s the Best Way to Remove the Old CPU Cooler?
First, the obvious: unplug your computer from the wall. Before you touch anything inside, ground yourself by tapping a metal part of the case.
Sometimes, the cooler doesn’t want to come off. Old paste can act like a stubborn glue. Whatever you do, don’t just yank it straight up. That’s how you rip a CPU right out of its socket and bend dozens of fragile pins. Ask me how I know.
The trick is to gently twist the cooler. Just a little bit, back and forth. This motion will break the seal of the old paste. You’ll feel it pop loose. Once it’s free, you can lift it straight off. If it’s really cemented on there, you can turn on the PC and run something demanding for a few minutes to warm up the paste before you shut it down and try again.
How Can I Safely Clean Old, Crusty Thermal Paste?
With the cooler removed, you’ll see the mess. It’s time to get both surfaces looking like new.
Put some isopropyl alcohol on your lint-free cloth and start wiping the top of the CPU. Use gentle but firm pressure to get the bulk of it off. You may need to reapply alcohol and switch to a clean part of the cloth a few times. For the edges, a cotton swab dipped in alcohol works great. Just be careful not to slop any paste onto the motherboard itself.
Now, do the same thing for the base of the cooler. Wipe it down until all the old gunk is gone and the metal is shining.
For the final step, grab a completely dry, clean cloth and give both surfaces one last pass. This makes sure there’s no alcohol residue left. You want them perfectly clean and dry.
Which Application Method Should I Actually Use?
The internet loves to argue about this. You’ll see fierce debates over dots, lines, crosses, and manual spreads. The reality is that for almost every standard CPU out there, one method stands above the rest in terms of simplicity and effectiveness.
Is the “Pea-Sized Dot” Method Still the Best?
Yes. It is. There’s a reason the single dot method is the go-to: it’s easy and it works flawlessly. The whole idea is to let the cooler’s mounting pressure do the spreading for you.
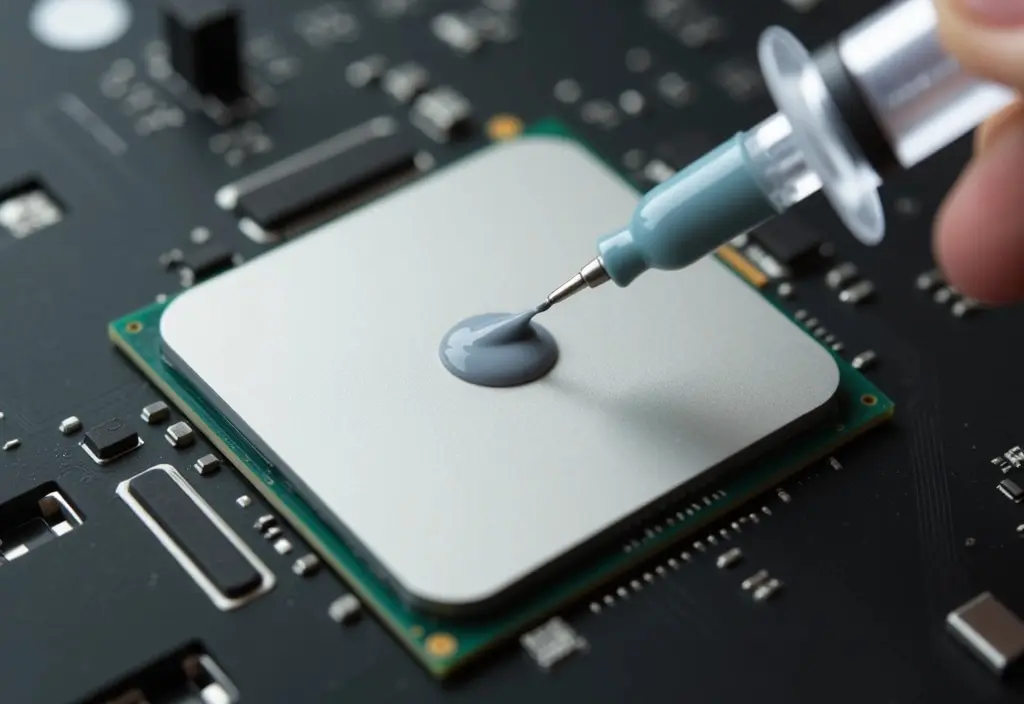
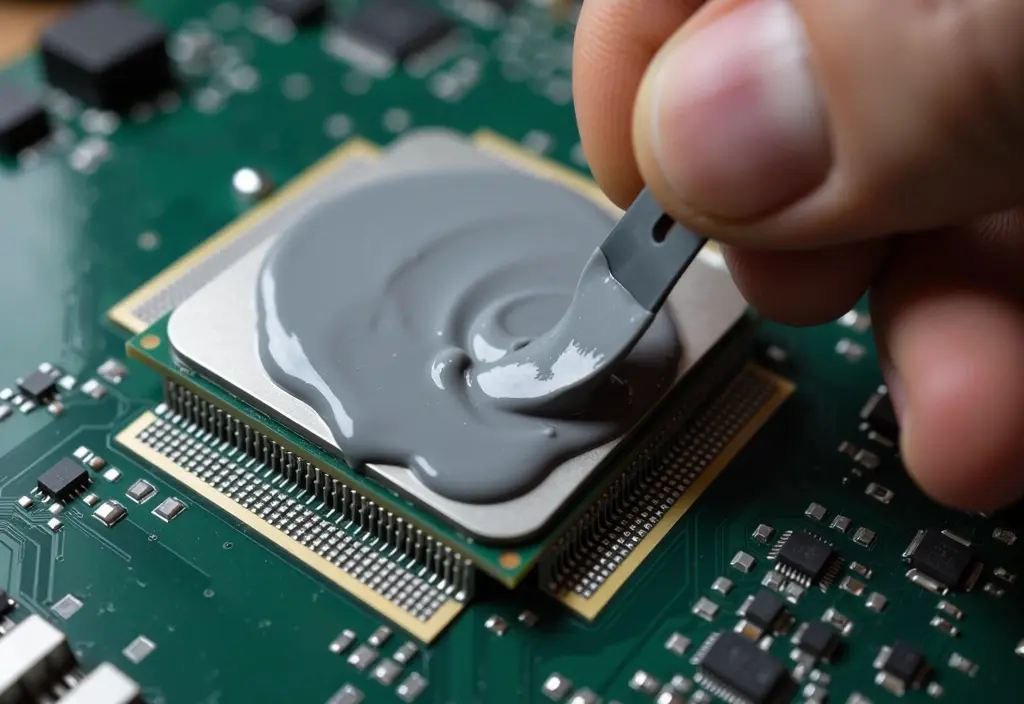
You just squeeze out a small blob of paste—about the size of a small pea or a big grain of rice—right in the center of the CPU. That’s it. When you install the cooler, the even pressure spreads the paste out from the center, pushing air away as it goes. It’s the most foolproof way to get great coverage without trapping air bubbles.
It’s the first method I ever learned, and it’s the one I still use on every build. For a standard square processor, it’s the undisputed champion.
What About the “Line” or “Cross” Methods?
The line and cross (or “X”) methods are just variations of the dot. Instead of a dot, you lay down a thin line of paste, or two lines in an X. These can be useful for really big, rectangular CPUs, like an AMD Threadripper. On those chips, a central dot might not have enough paste to reach the far corners. A line or an X gives it a better starting point.
But for your typical desktop processor from Intel or AMD? It’s overkill. It just increases the chance of paste squeezing out the sides if you use a little too much.
Should I Ever Manually Spread the Paste?
This is where you put paste on the CPU and then use a tiny spatula or the edge of a credit card to spread it out into a paper-thin layer yourself before mounting the cooler.
It sounds like a great idea. Perfect coverage, right? In reality, I advise against it. It’s incredibly hard to get the layer as thin as the pressure-spread method does. Worse, you can easily create tiny air bubbles in the paste as you spread it, which defeats the entire purpose by hurting thermal performance.
I tried it once. It was a mess. My temps were actually a few degrees higher than when I wiped it all off and just used a simple dot. It’s not worth the frustration.
How Much Thermal Paste Is Too Much (Or Too Little)?
This is the one thing you really need to get right. You want just enough paste to fill in those microscopic gaps and nothing more. The paste is a better conductor than air, but it’s a worse conductor than direct metal-on-metal contact. Piling on a thick layer of paste will actually act as an insulator and make your cooling worse.
Too little is also a problem. A tiny pinhead-sized drop won’t spread far enough, leaving hot spots on your CPU.
Too much is the classic rookie mistake. A massive glob will just squish out the sides, making a greasy mess on your motherboard. While most modern pastes won’t cause an electrical short, it’s a pain to clean and provides zero benefits.
Think like Goldilocks. A single dot about 4-5mm across is just right.
Are You Ready? Here’s How to Apply the Thermal Paste, Step-by-Step.
You’ve done the prep work. The hard part is over. This takes less than 60 seconds.
- Final Check. One last look. Is the CPU spotless? Is the cooler base spotless? Good.
- Apply the Dot. Pop the cap off your thermal paste. Hold the syringe directly over the center of the CPU lid. Gently squeeze the plunger until you have a single, pea-sized dot.
- Prep the Cooler. Make sure the mounting brackets are ready. Most importantly, if your cooler is brand new, for the third and final time, remove the plastic protective film from the bottom. We’ve all been there. It’s the most common PC building mistake, period.
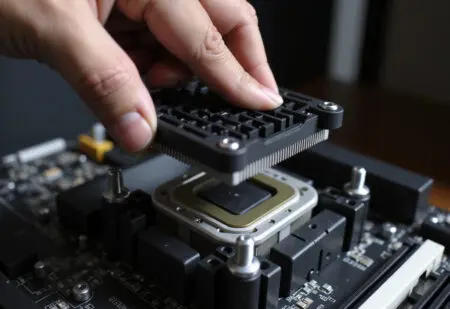
- Mount the Cooler. Take a deep breath. Hold the cooler by its frame and line it up with the mounting points. Lower it straight down onto the CPU. Vertical contact is key. Don’t slide it, don’t wiggle it, and don’t lift it back up after it makes contact.
- Secure the Cooler. Fasten the cooler down. If it uses screws, tighten them in a star pattern, a few turns at a time on each one. This distributes the pressure evenly, which is crucial for a good paste spread.
- Don’t Go Crazy. Tighten the screws until they stop. They need to be snug, not herculean. You can damage your motherboard by overtightening them.
That’s it. Plug the fan into the “CPU_FAN” header on your motherboard. You’re done.
What Common Mistakes Should I Watch Out For?
Even when you know the steps, it’s easy to slip up. Keep these common blunders in mind.
- Forgetting the Plastic Film: Yes, I’m saying it again. I once spent a frantic hour trying to figure out why a new build kept instantly overheating and shutting down. The culprit? A thin layer of melted plastic. The embarrassment is real.
- Pasting the Heatsink: You can do this, but it’s harder to get it centered correctly. Putting the dot on the CPU ensures the paste is exactly where it needs to be—right over the processor’s core.
- Using Old, Crusty Paste: Thermal paste doesn’t last forever. If that tube has been in your junk drawer since 2015, toss it. It’s probably dried out.
- Rushing the Cleaning: Taking an extra minute to get the surfaces perfectly clean can literally make a several-degree difference in your final temperatures. Don’t get lazy here.
How Often Should I Replace My Thermal Paste?
There’s no magic number. It depends on the quality of your paste and how hard you run your PC. A high-quality paste can easily last three to five years, sometimes longer. A cheap, generic paste might start to dry out and fail after just a year or two.
The best way to know is to just keep an eye on your temperatures. Use a free program like Core Temp or HWMonitor to see how hot your CPU gets. If you notice your temps are consistently 5-10°C hotter than they used to be, it’s probably time for a fresh application. For a deeper dive into the science of heat transfer, you can explore resources from places like MIT’s Department of Mechanical Engineering.
Applying thermal paste might seem like a small, stressful step, but it’s a fundamental PC building skill. It’s a simple task that pays huge dividends in performance and longevity. By following these steps, you’re taking care of the heart of your machine.
Now go on, put the side panel back on your case. Boot it up, check your temps, and enjoy the quiet, stable performance you just achieved.
FAQ – How to Apply Thermal Paste to a CPU
What tools do I need to apply thermal paste properly?
You need high-quality thermal paste, isopropyl alcohol, lint-free cloths or microfiber towels, cotton swabs for detail cleaning, and optionally nitrile gloves to keep the paste off your hands and prevent contamination.
How do I clean old thermal paste from my CPU and cooler?
To clean old thermal paste, gently wipe both surfaces with isopropyl alcohol (90% or higher) using a lint-free cloth or cotton swabs. Ensure both surfaces are thoroughly clean and dry before applying new paste to ensure optimal heat transfer.
What is the recommended method for applying thermal paste on a CPU?
The most reliable and effective method is the ‘pea-sized dot’ technique. You place a small amount of paste, about the size of a pea, in the center of the CPU. When the cooler is mounted, pressure spreads the paste evenly, ensuring good contact without air bubbles.
Why is applying thermal paste important when building a PC?
Applying thermal paste is essential because it fills in microscopic imperfections between the CPU and cooler, creating an efficient heat transfer bridge. This helps keep the CPU cool and prevents overheating, which can lead to poor performance and potential damage.

